Assembly and User Instructions for the Mounting Kit for ZWO ASIAIR and EAF Belt Drive for the William Optics Zenithstar 61 APO Telescopes
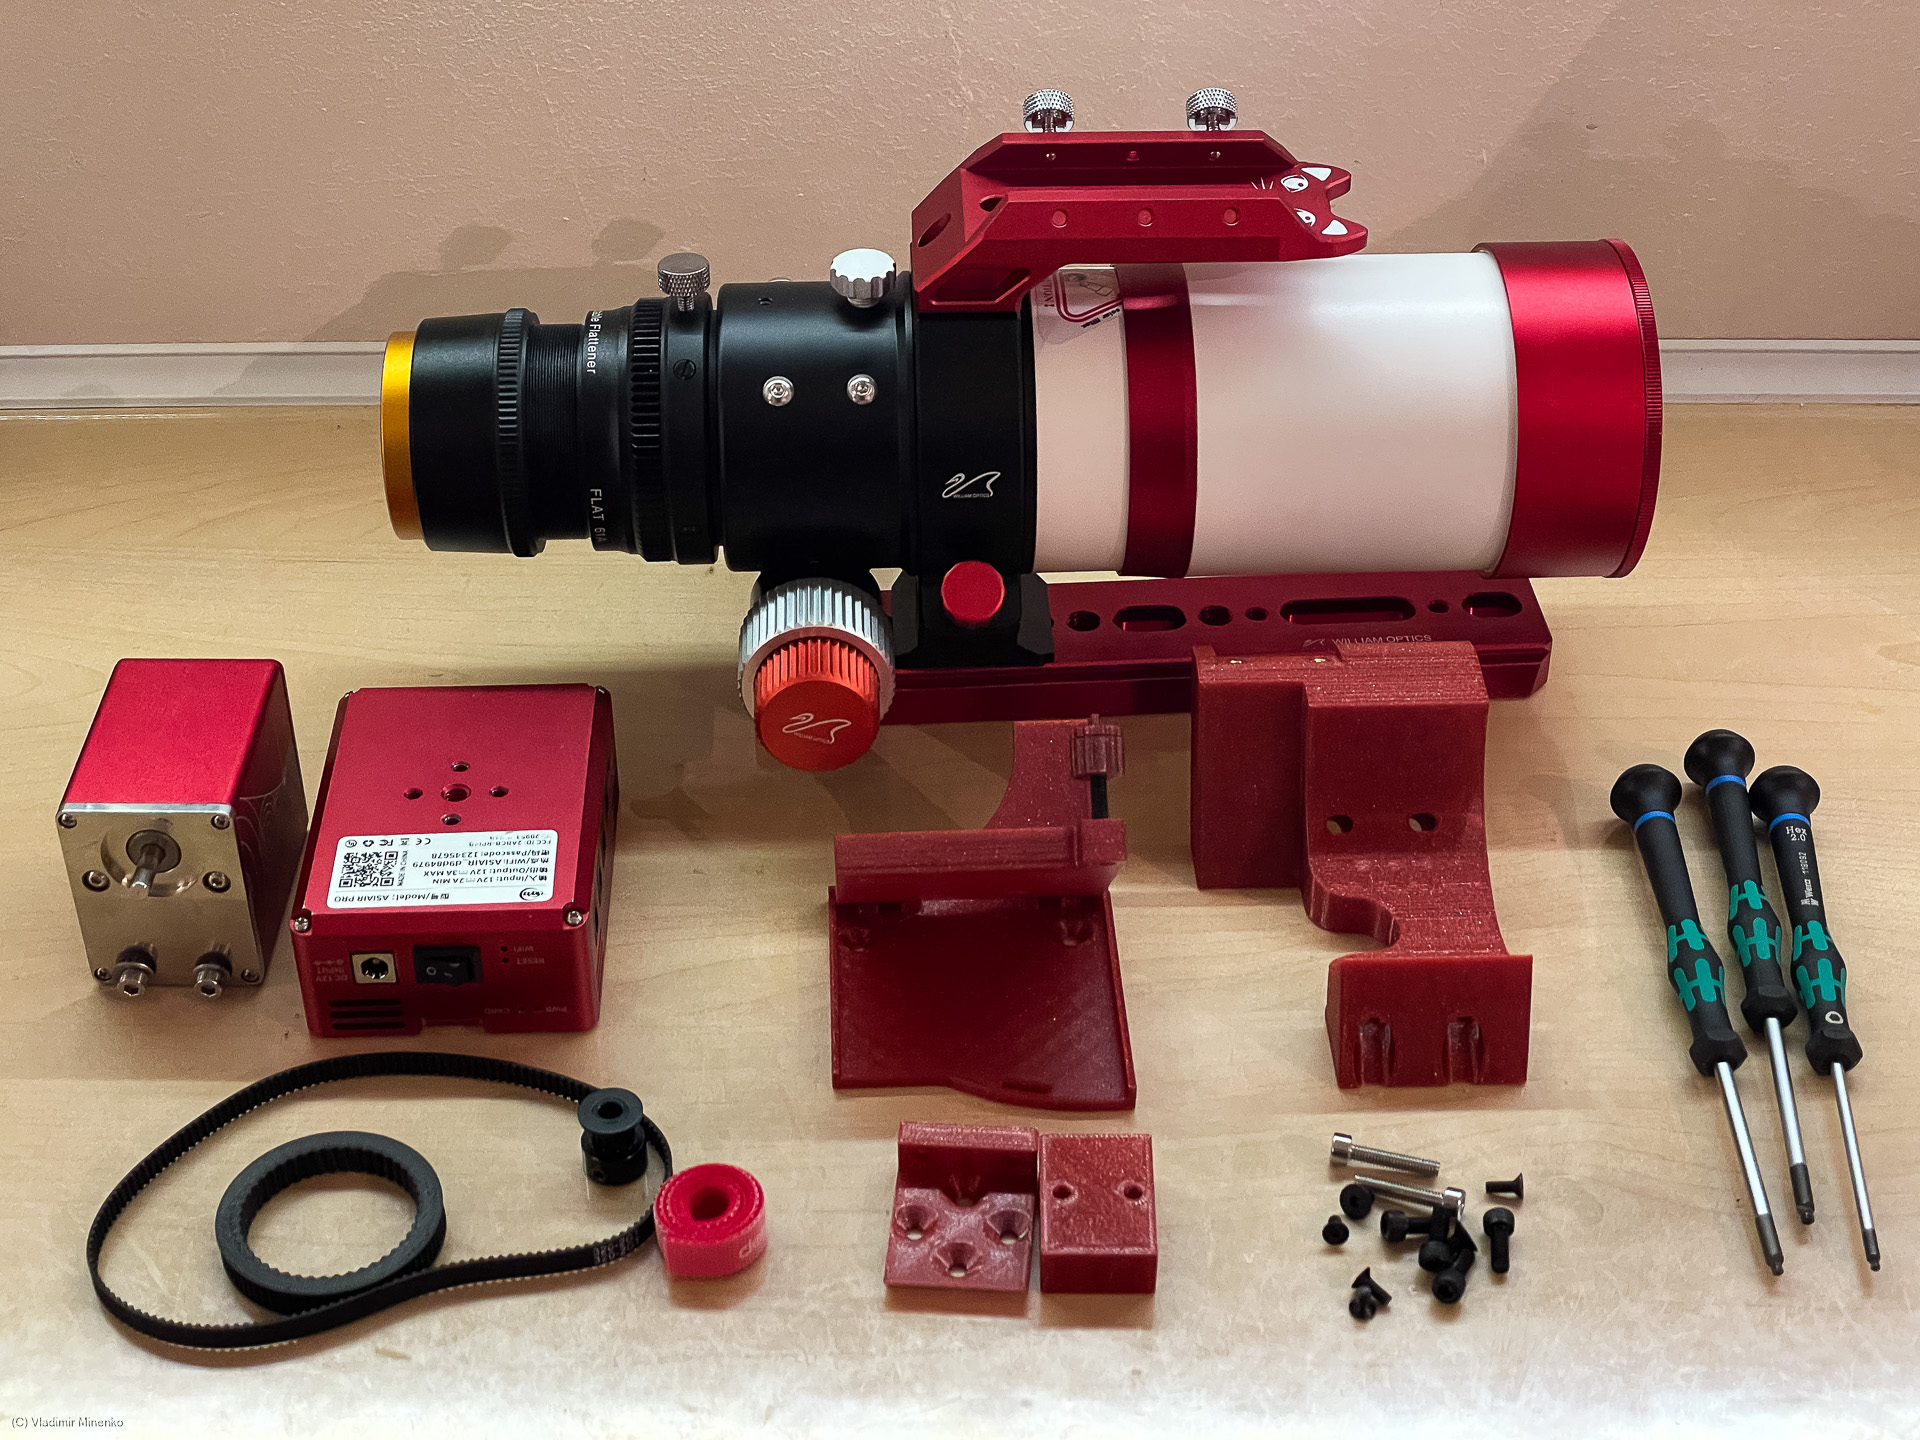
This page goes through the assembly steps for this mounting kit. You will need the telescope itself, EAF with its mounting screws, ASIAIR and the parts of the kit. All versions of ASIAIR starting with Pro can be used with the kit. This page uses the Pro version as an example
We start with removing the guide scope saddle. We will later put it back again, but with a small elevation platform underneath.

We also remove the screes which are shipped and placed on the focuser of telescope as placeholders for a viewer clamp.

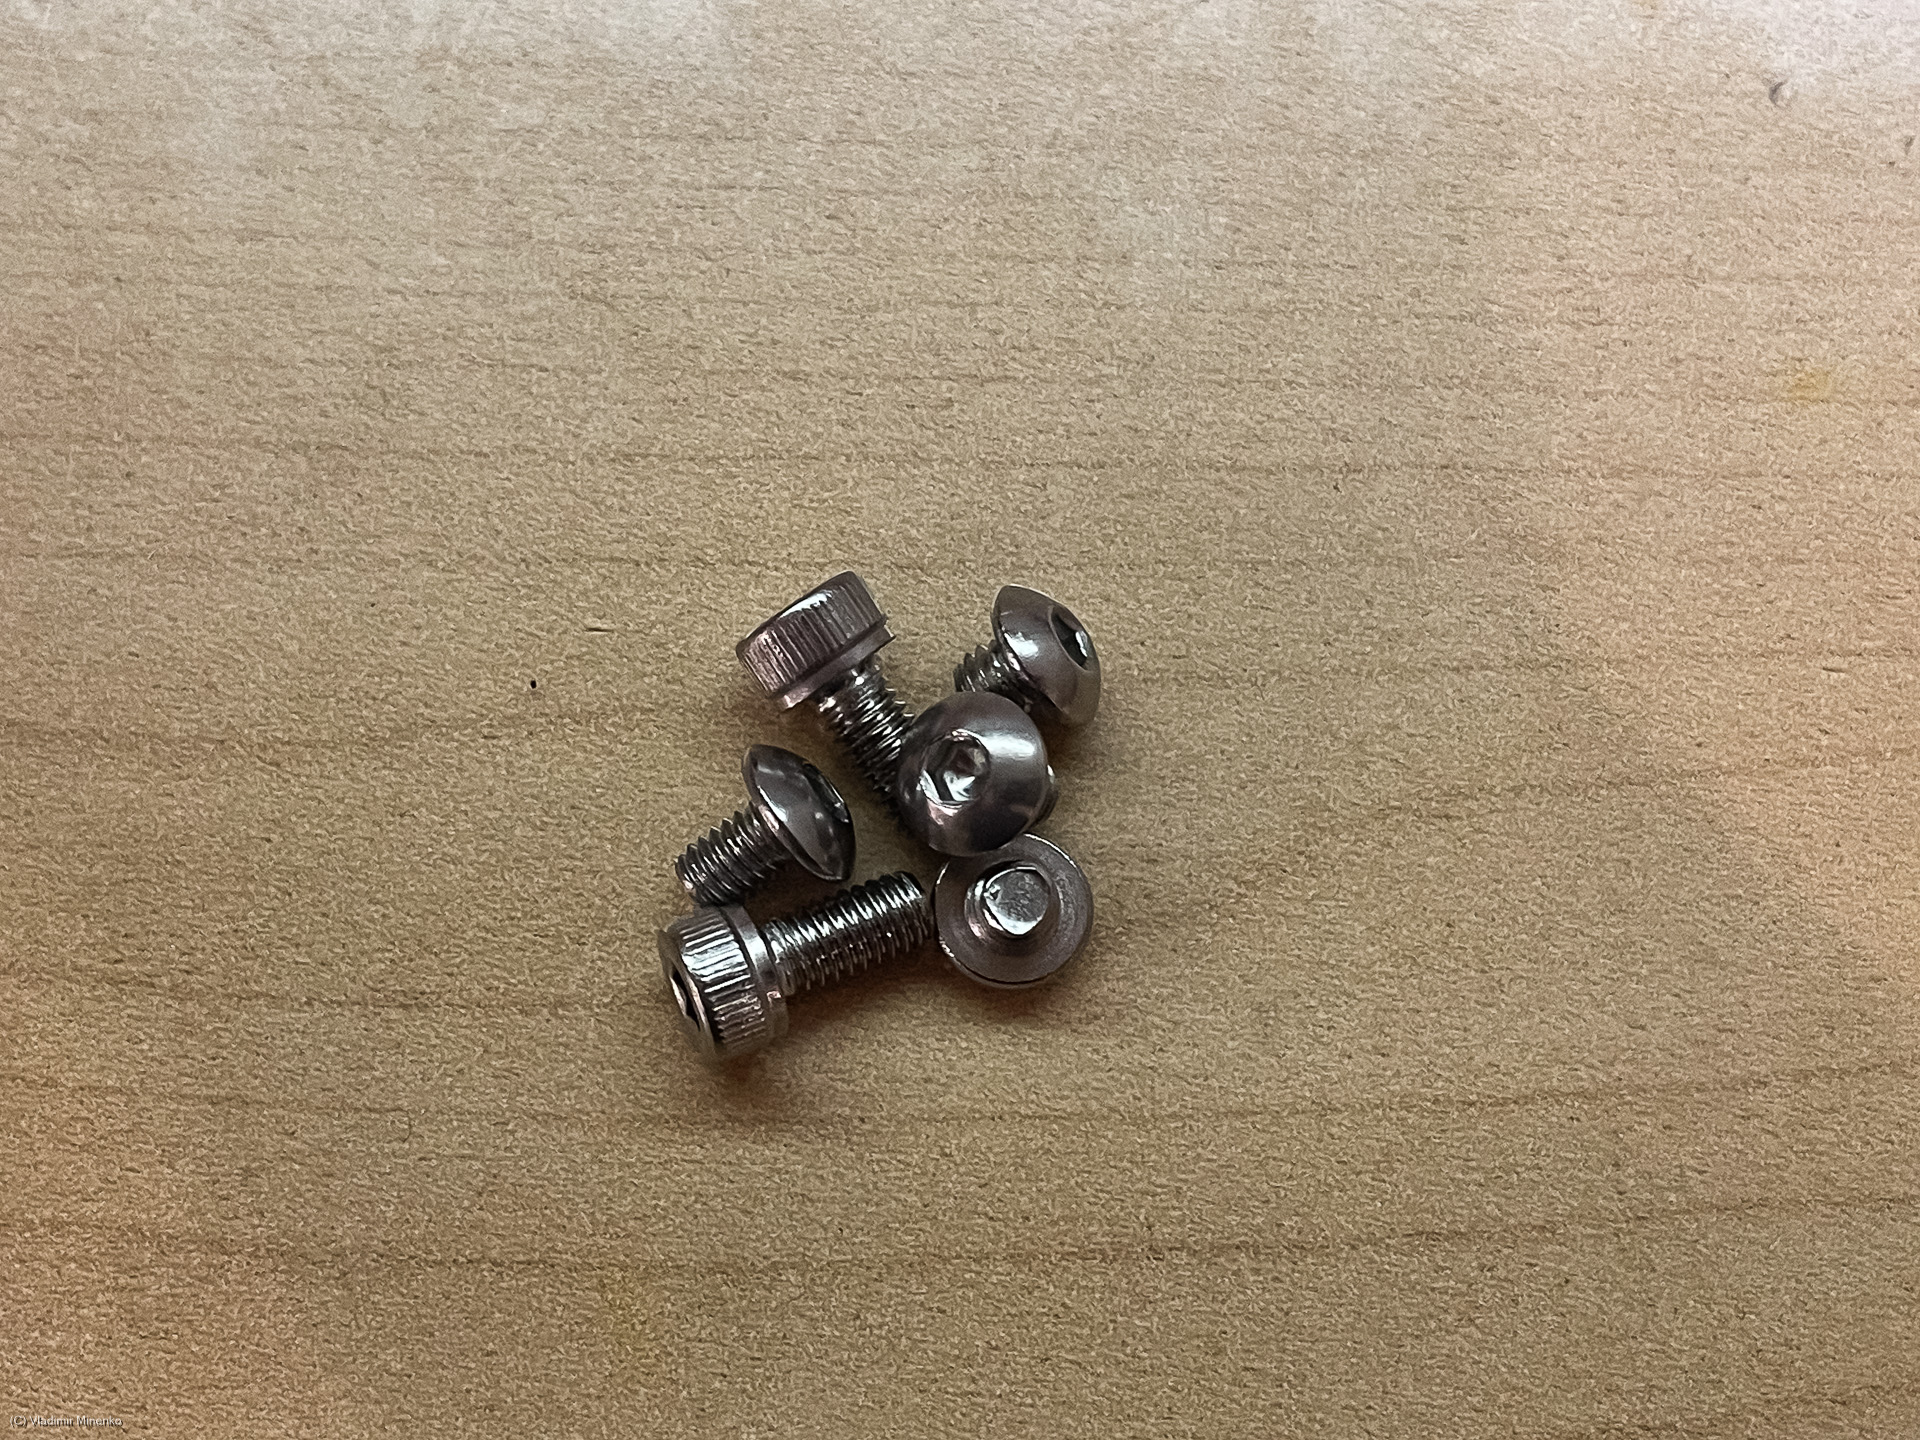
You will not need none of these screws, nor the screws which were used for the saddle. Put them away and keep them somewhere for the case you might decide to remove the kit and use the telescope in another way:
All the four holes on the focuser are used to hold the main frame of the kit:

Use the the four 14mm M4 screws with the round head for this. The below picture shows three since one is already used in the picture above 🙂

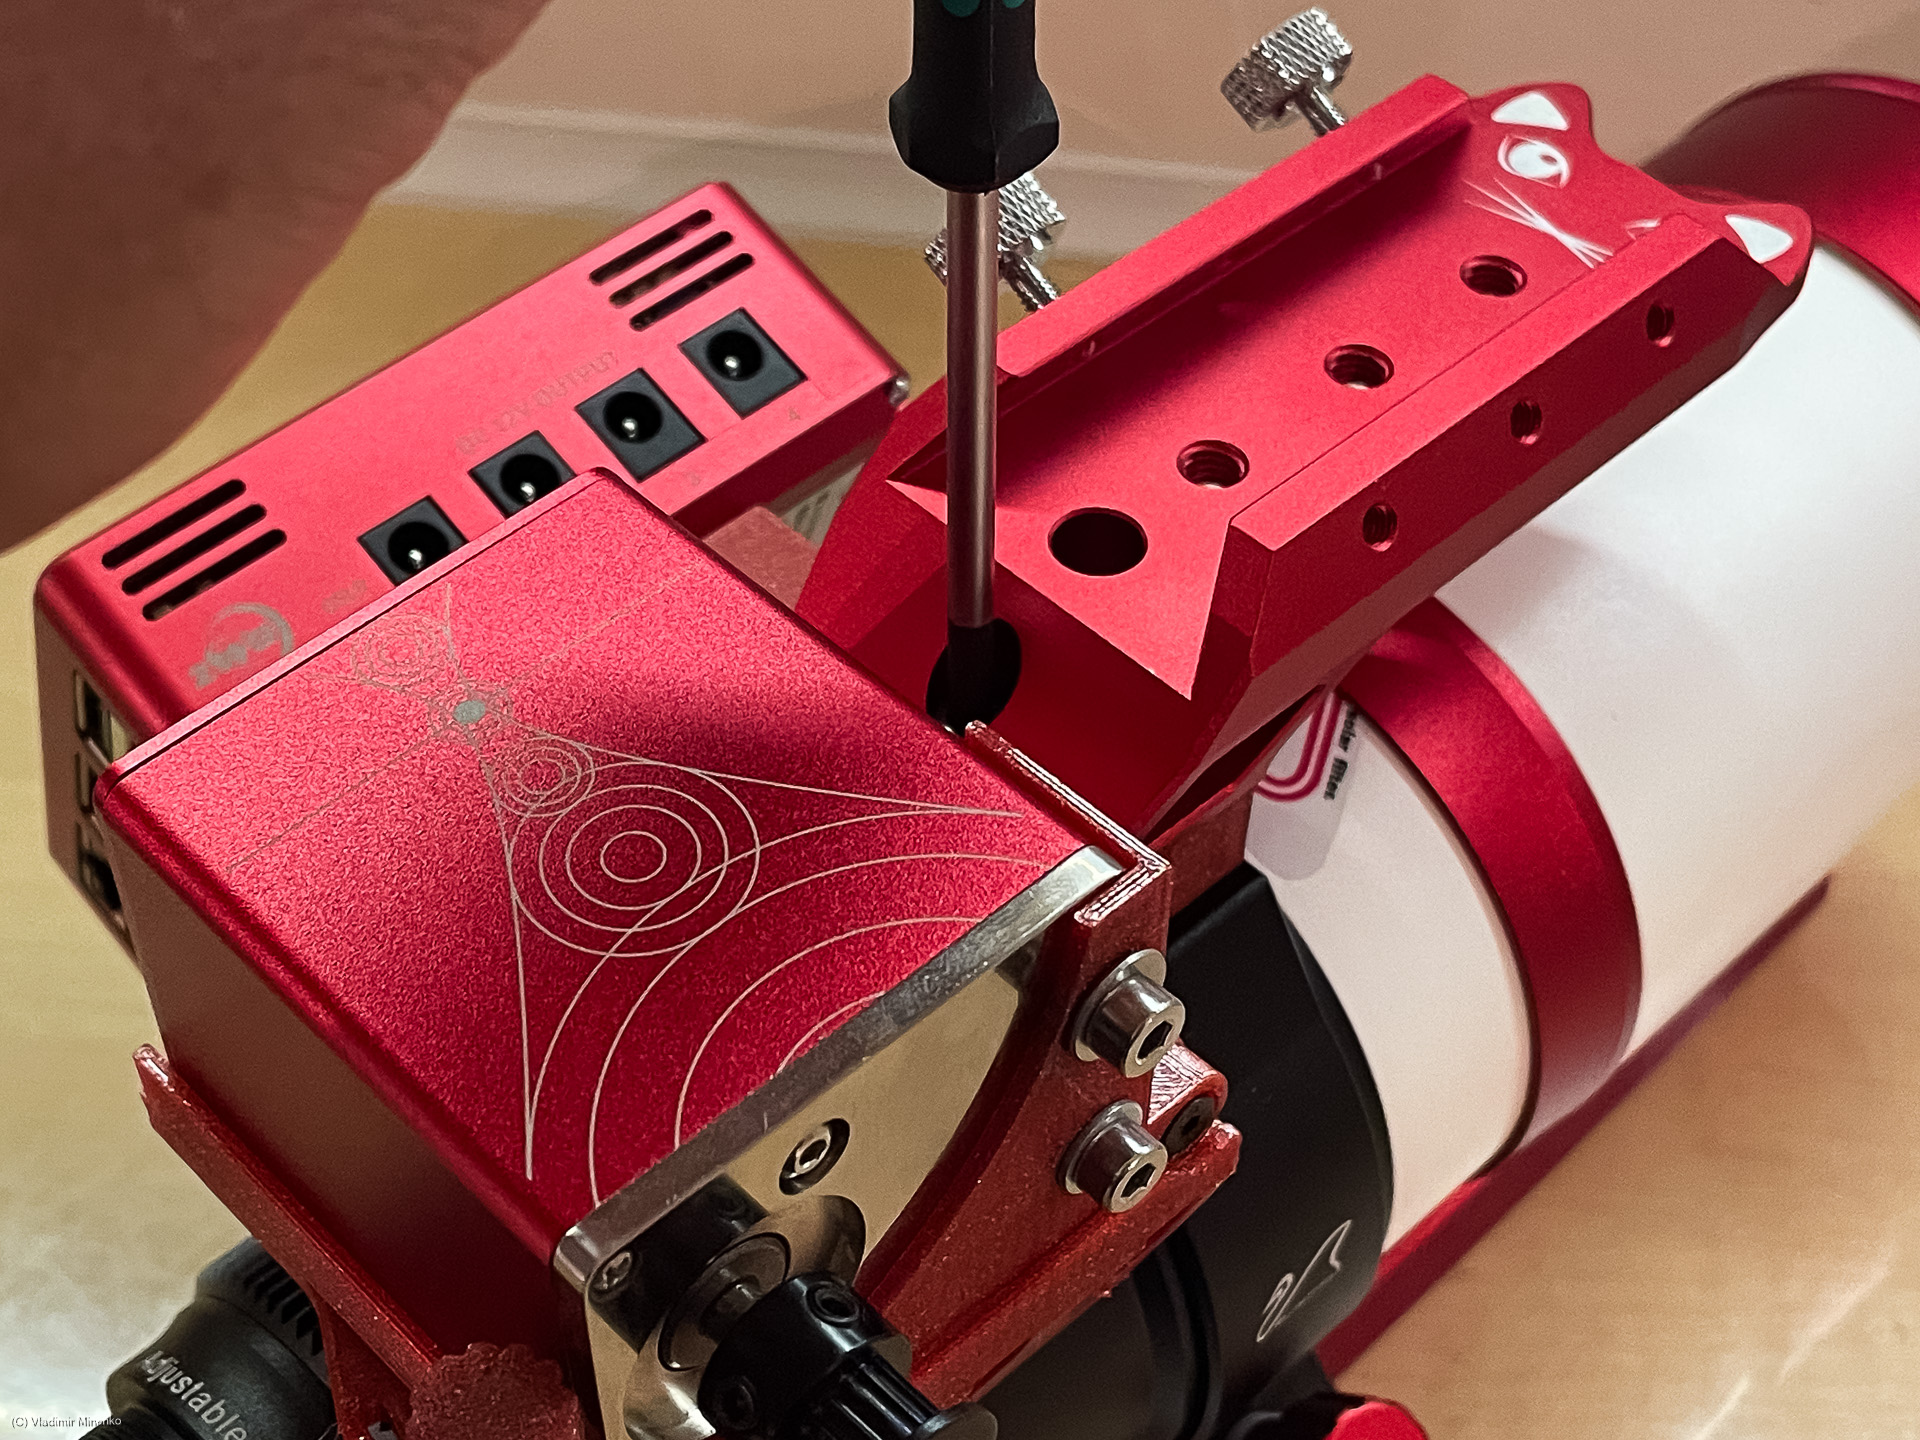
As next, we deal with mounting the EAF and start with its holder. It will go on the top of the main frame. Use the two small M3 screws for this:

Make sure you put the holder in this orientation:

After this is done, place the pulley on the EAX axis. You might want not to tighten the screws now, and do this after the assembly is finished, since then you can better see which distance from the EAF body is the best to align the position of he pulley on EAF axis with the focuser knob.

Mount the EAF into the holder. For this, you use the screws which are shipped with EAF.

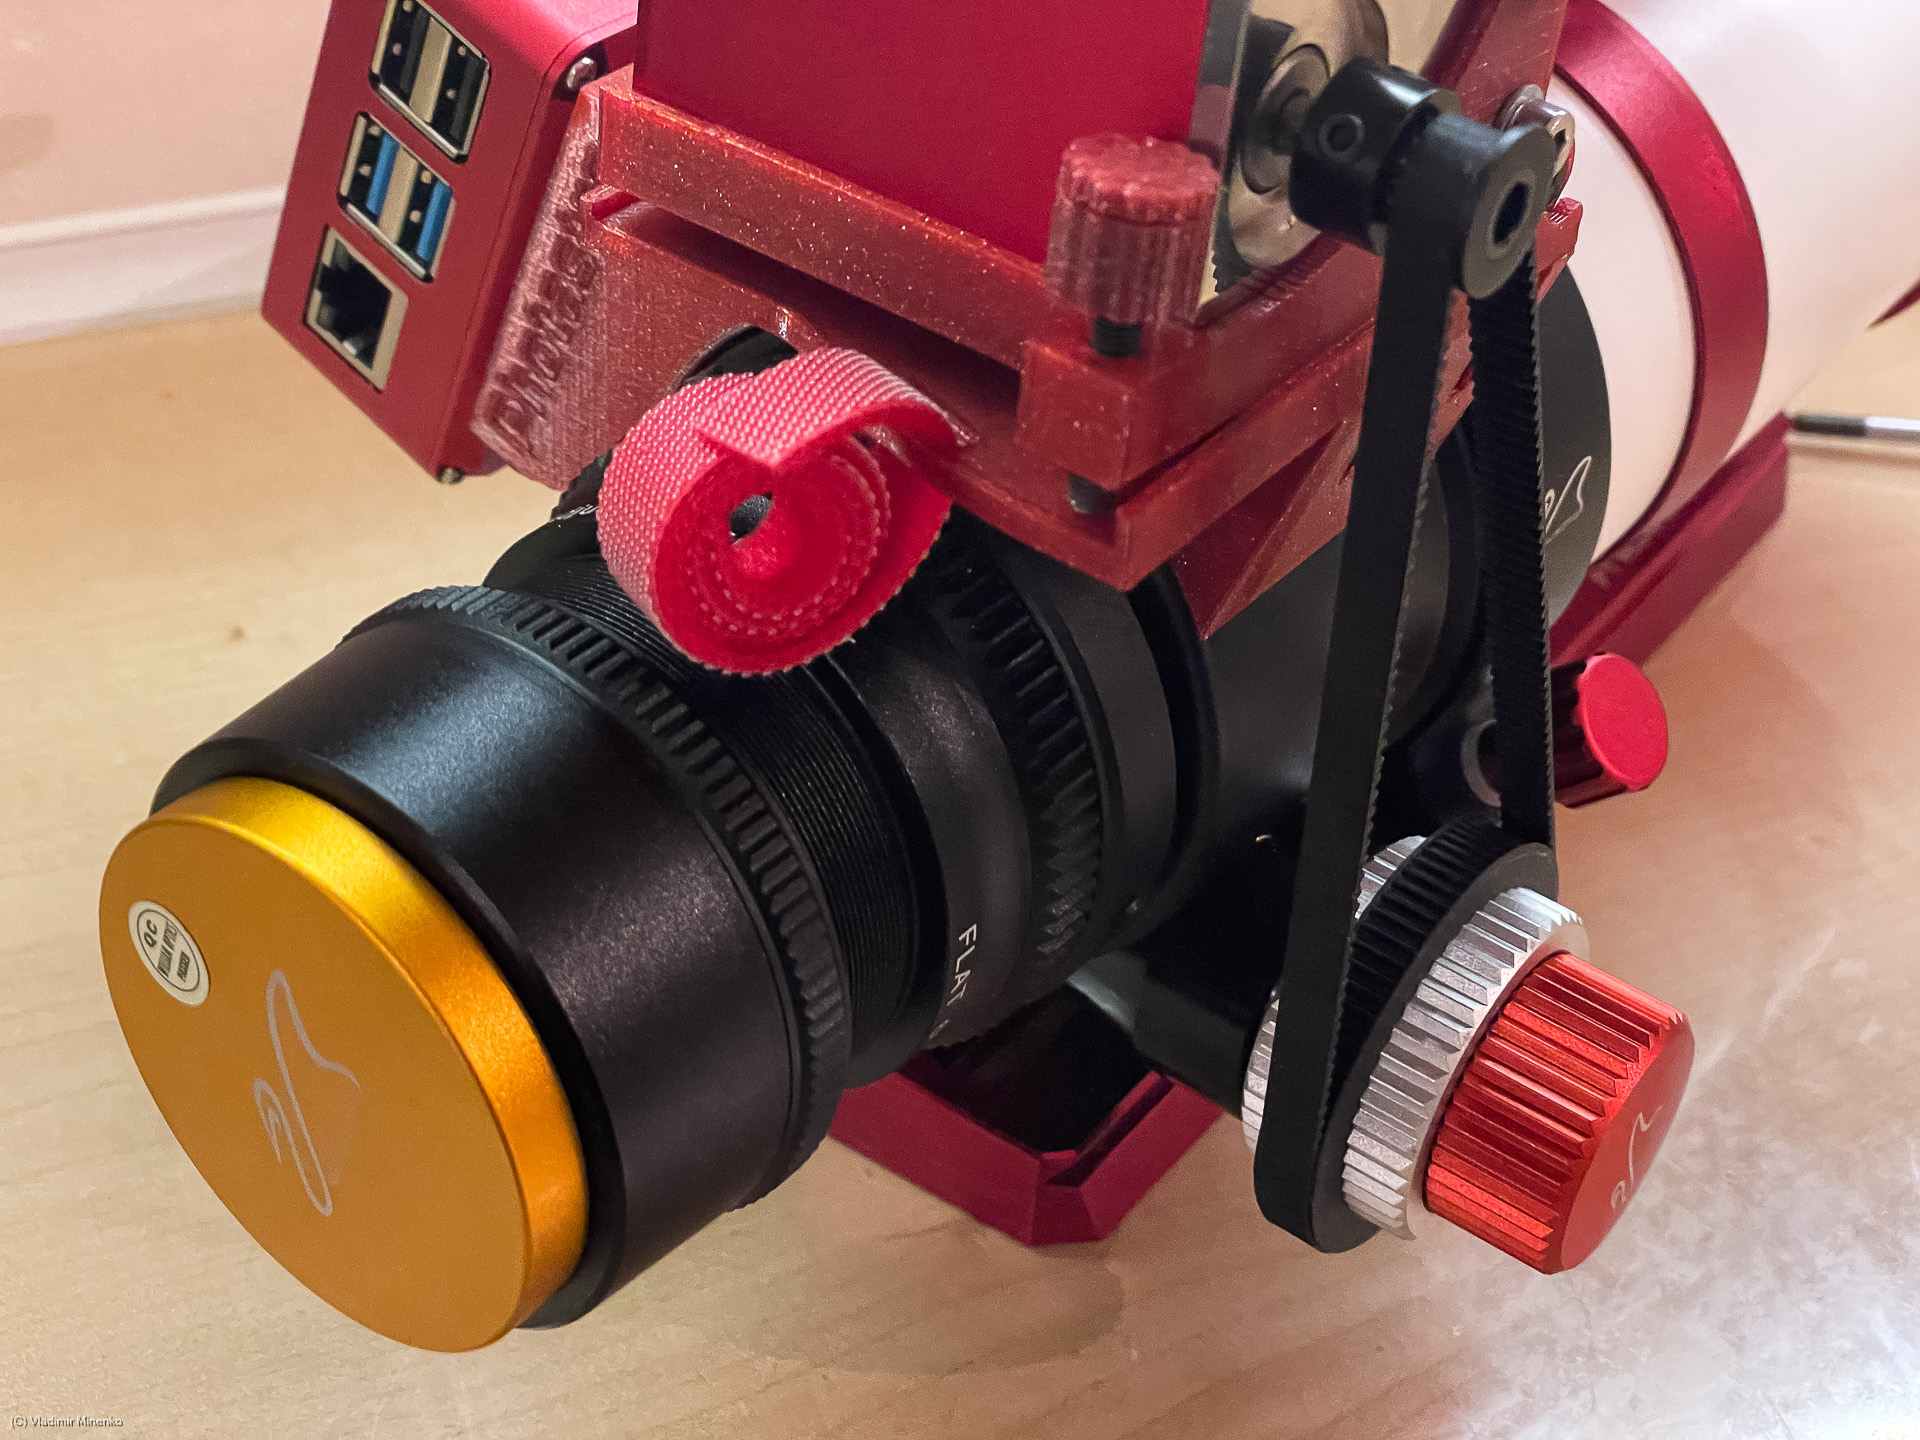
The EAF drives the coarse knob of the focuser via an adapter which is included in the kit. The easiest way to put it on is to first put the belt on the pulley an then slide the adapter onto the knob while the belt embraces it.

In the idle position the belt hangs loose. The tension screw on the hold is used to bring the belt tension in the operational state. You do not need a large tension. It should be just a bit more than the level when the belt does not hang loose. It is a good idea to remove the tension after the use for a longer storage.

The ASIAIR sits in the main frame on an adapter.

The adapter and it position are designed the way that you can place ASIAIR in different orientation.
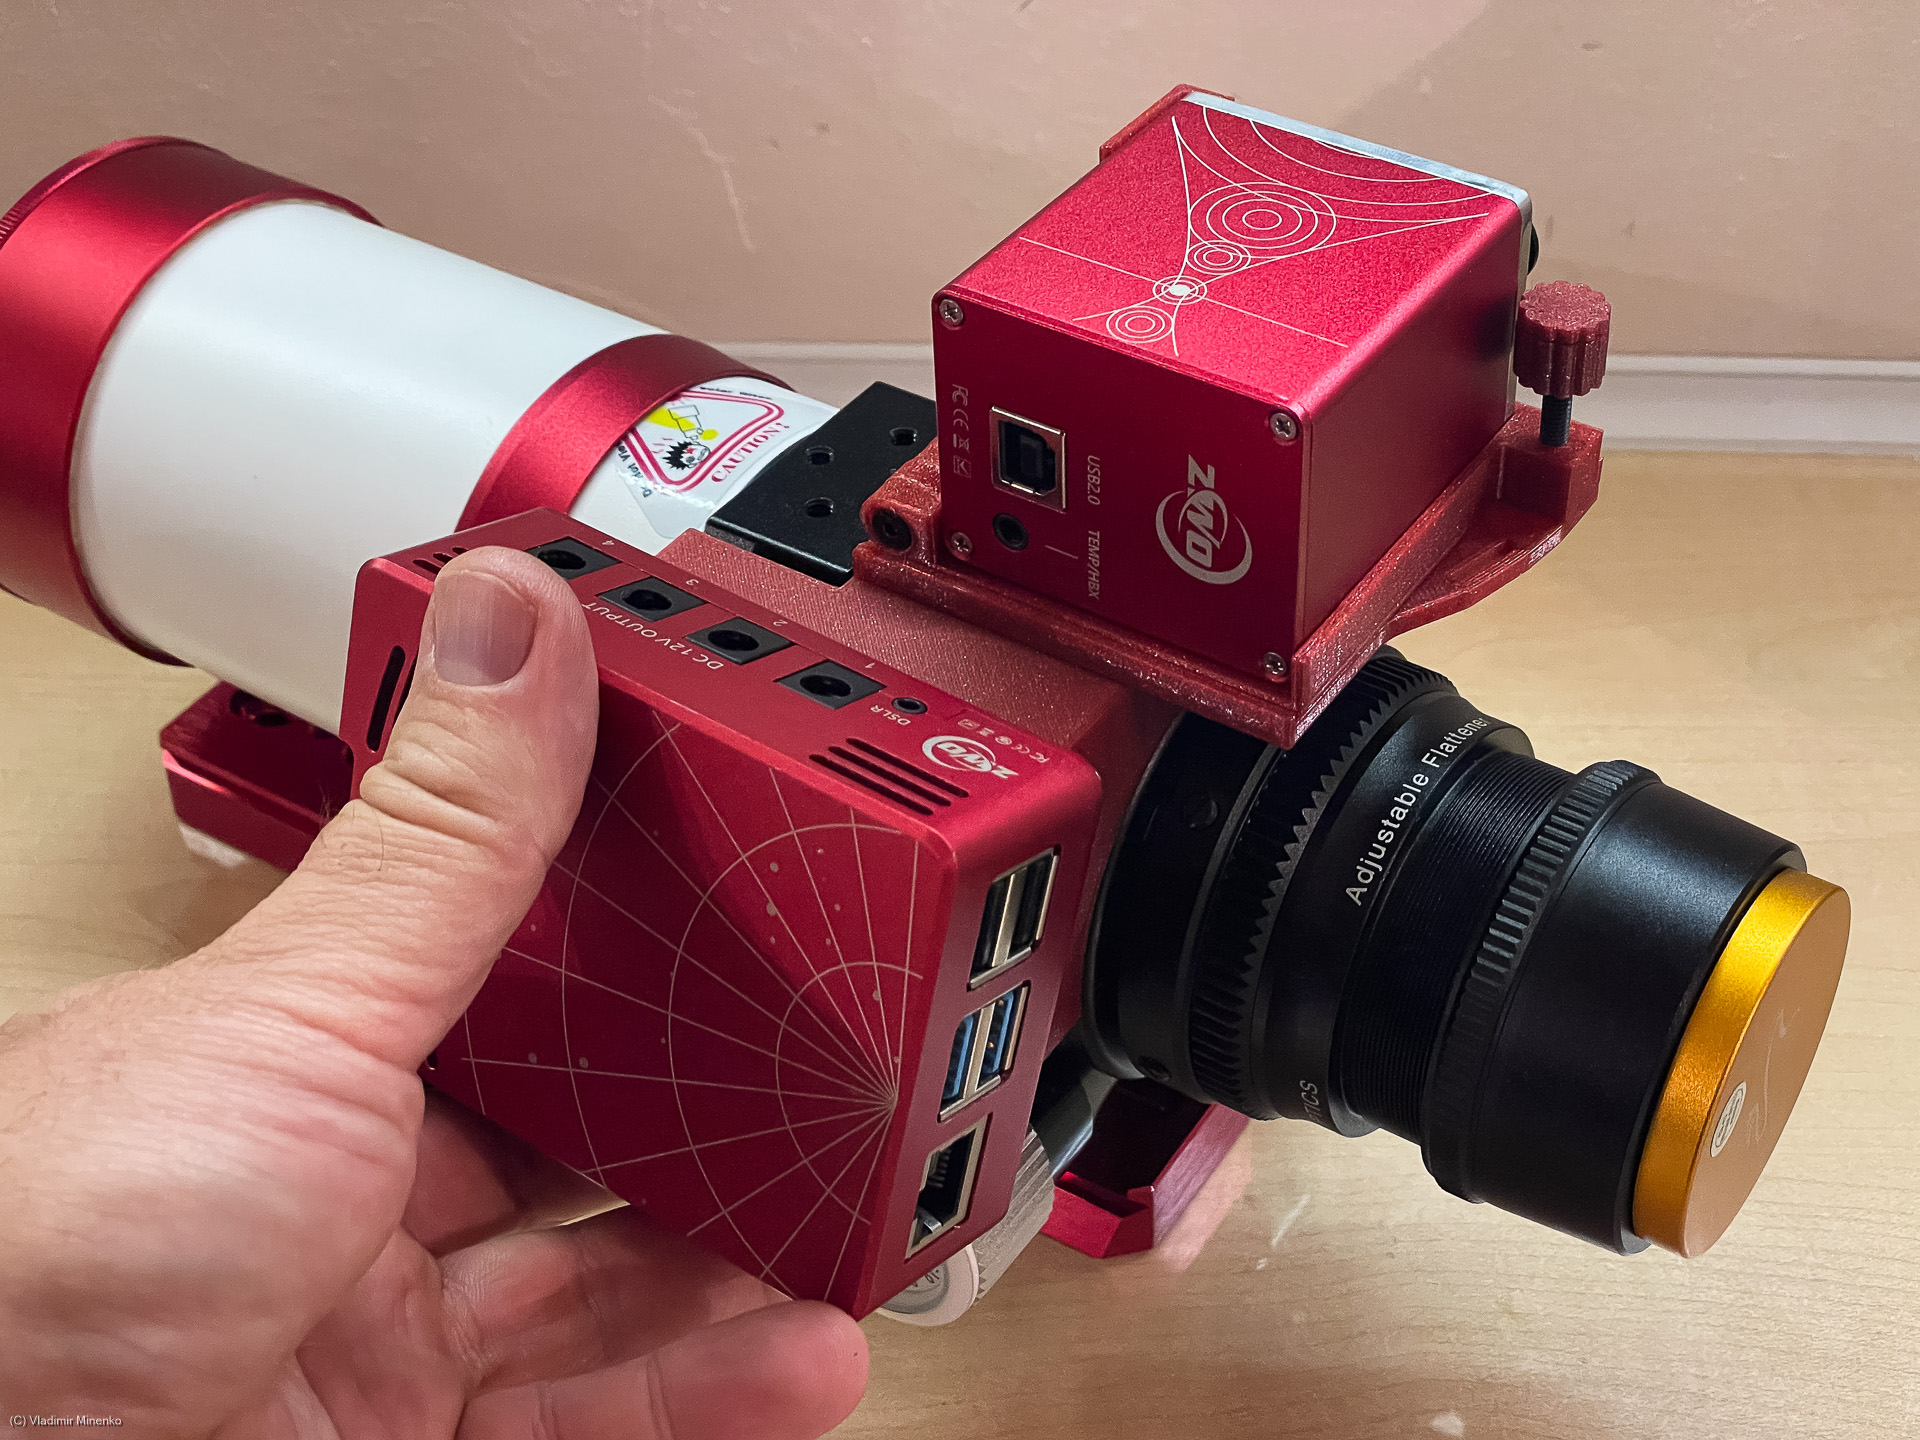
You can change the orientation later at anytime. The position of ASIAIR on the frame is selected so that all cable connectors should fit and don’t block each other. But it might make sense to think now with which orientation you want to start now

The orientation can be changed by changing the orientation of the how the adapter is mounted on ASIAIR. Use two small M4 screws with flat heads for this.
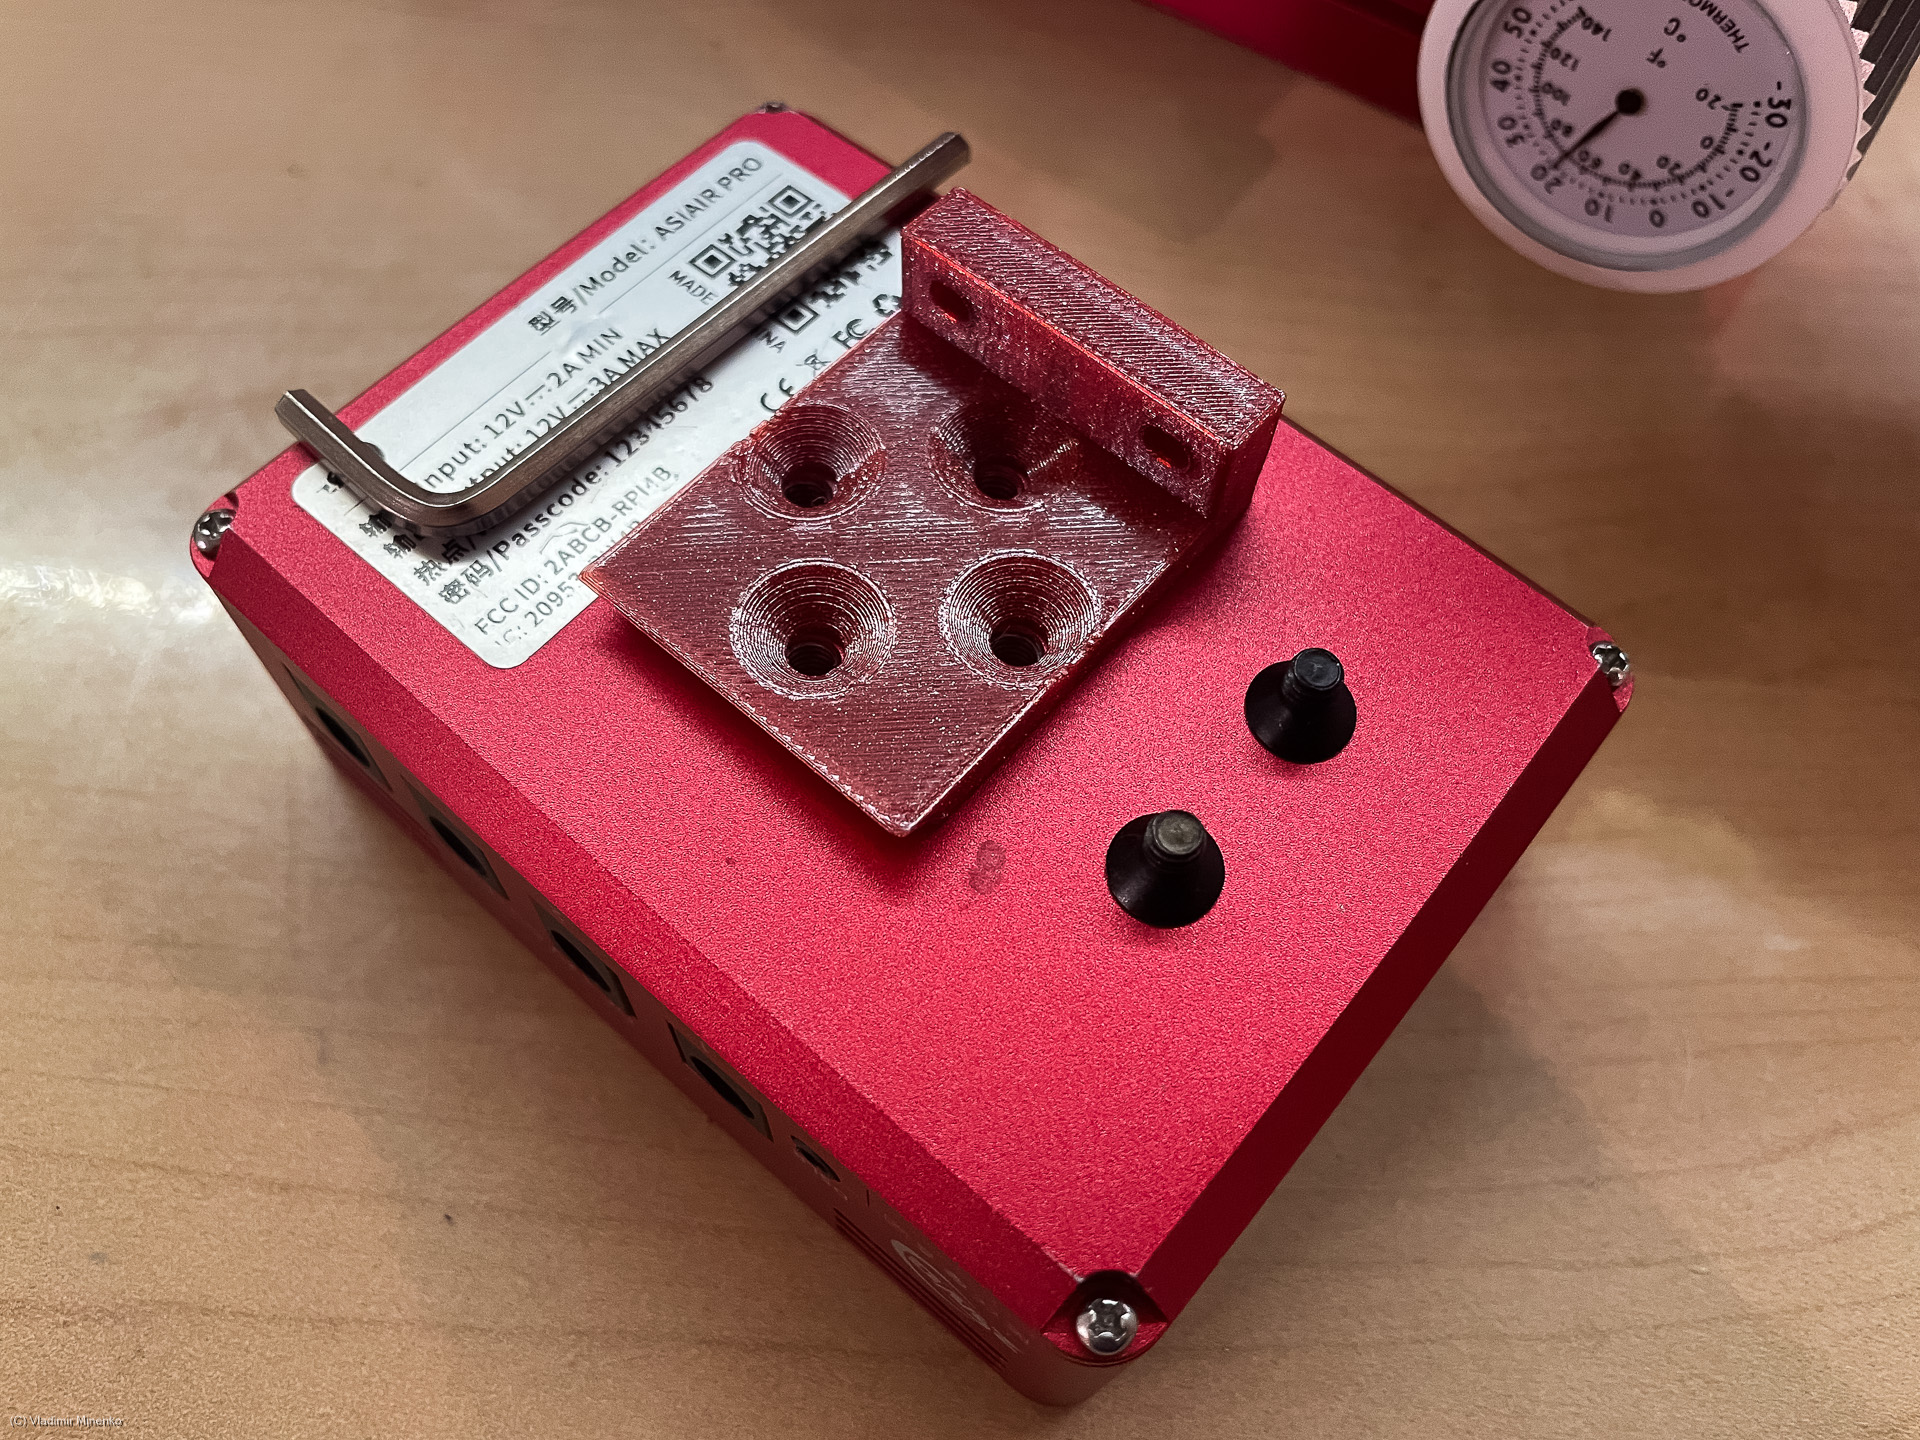
Put the telescope on its side and slide the ASIAIR on the adapter into the slot on the frame. Two longer M3 screws with flat head are used for mounting it on the frame.
After this, we return to the saddle which we removed on the first step. The saddle now comes back but it will sit on an elevation plate.

Two long M4 screws with round heads are provided for this. The are basically the same as the original ones, but around 12mm longer.
This plate will make sure that the back side of the guide scope and the guiding camera will pass over the top side of the EAF and not blocked by it.

The elevation distance is 12mm and should be sufficient for larger guide scopes as well.

The hook-and-loop fastener can be used for cable management. This picture below just shows it. Consider cutting the provided strip later, when you better know how your cable management would work and which pieces you would need.
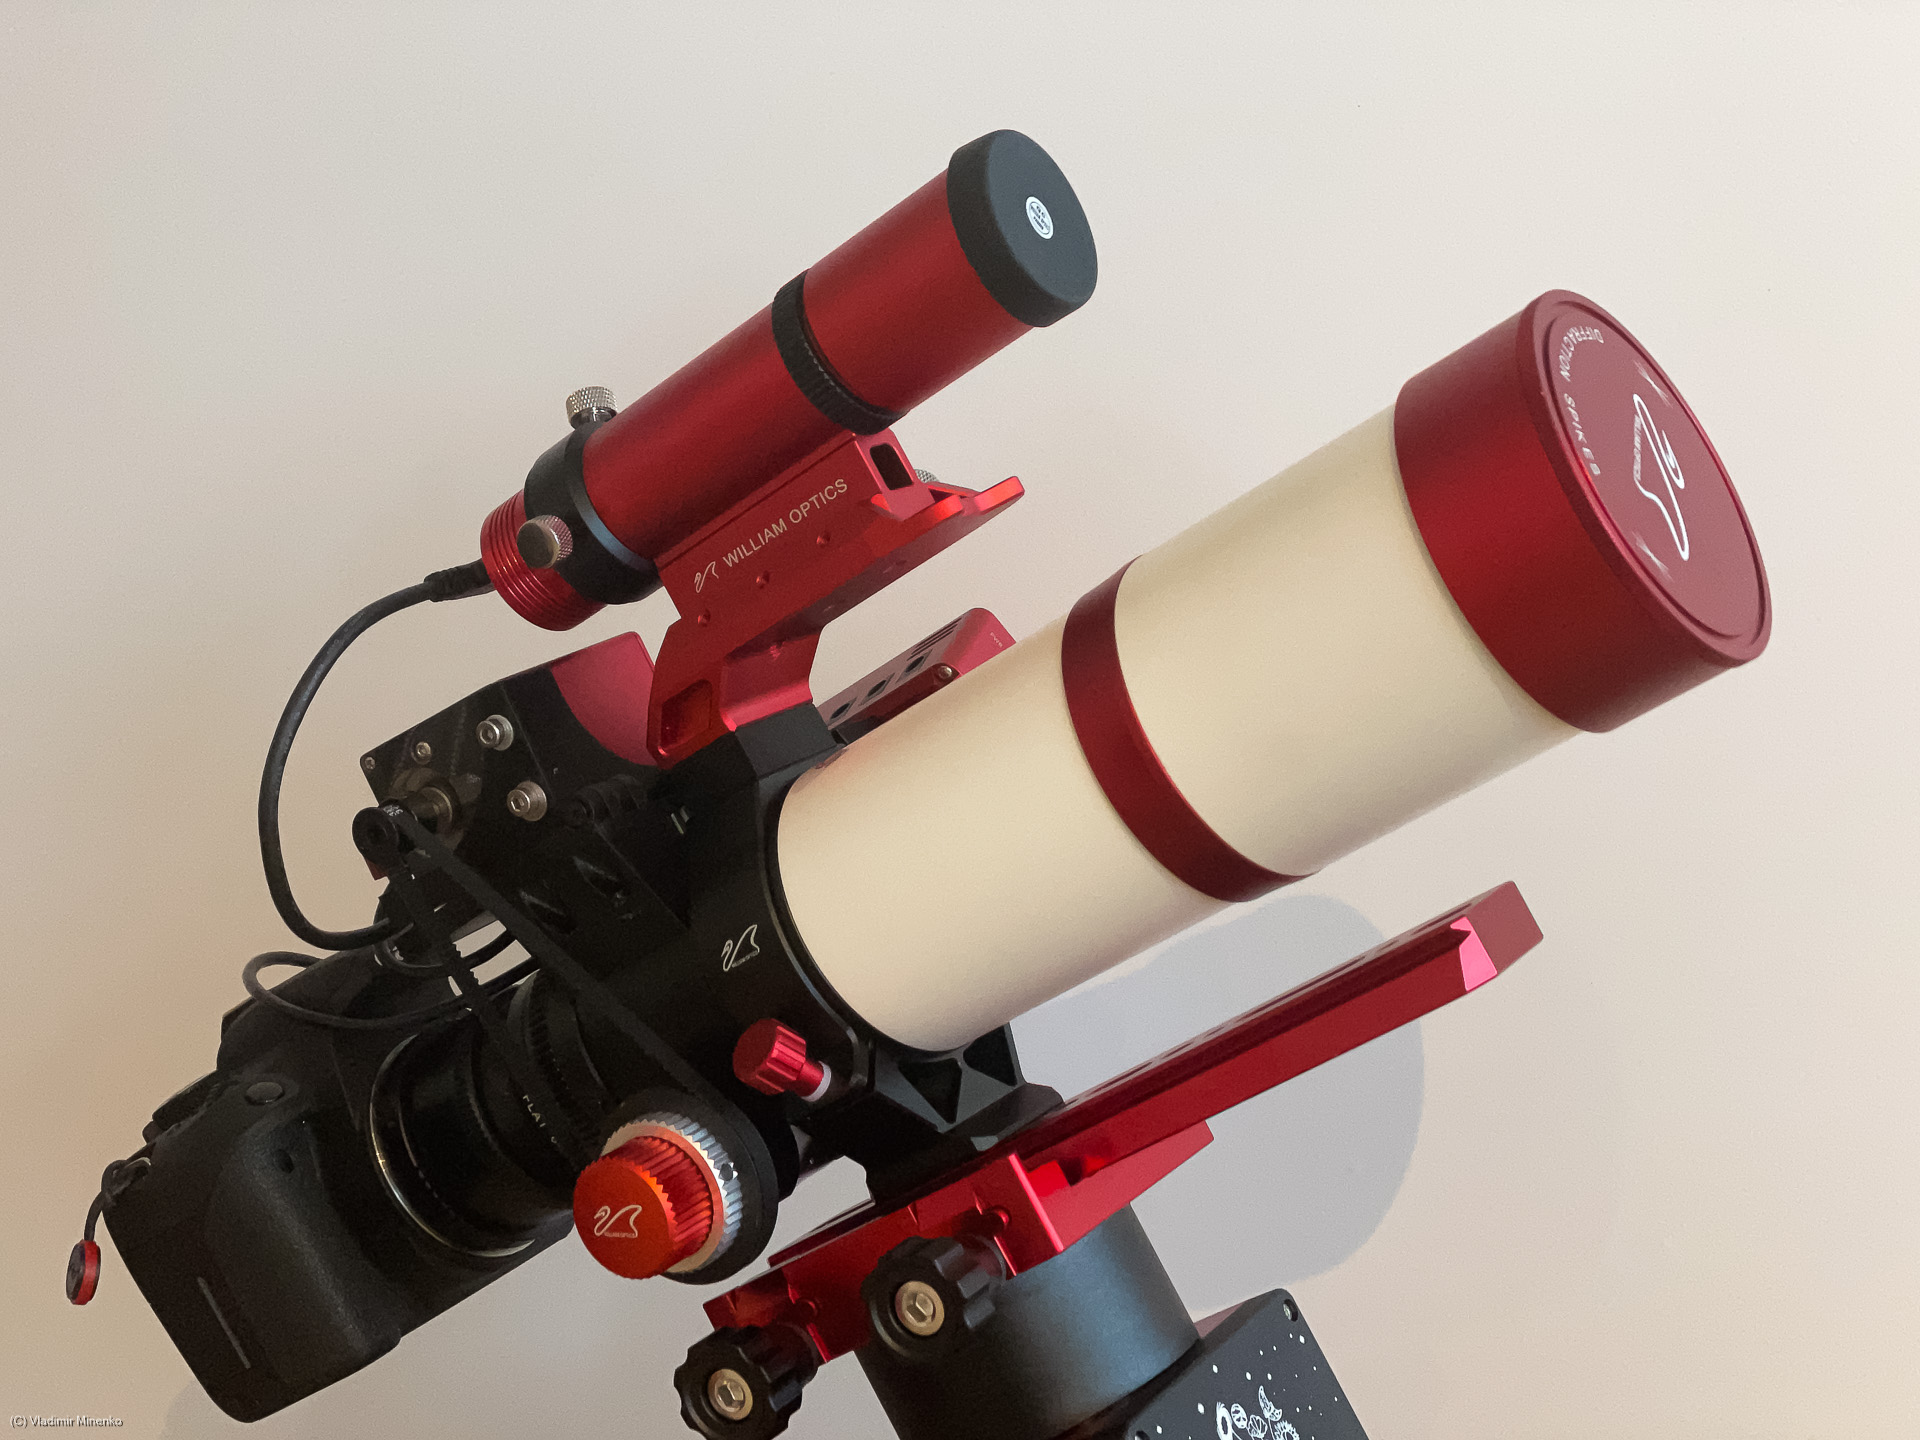
We are done! This is how the kit looks with a Canon DSLR attached to the scope and placed on ZWO AM3 mount

Now, go imaging! 🙂
If landed on this page just of of interest, you can also get the kit from the Photastro shop under this link.
Clear skies!
Comments
Got an opinion on this topic or found a mistake? Please add a comment.
0 Comments