Custom Landscapes for Stellarium and SkySafari with One Shot from an Insta360 Camera
Almost just ouf-of-the-box: no panorama stitching is neededThere are quite some guides on the Internet on how to add a custom landscape scenery to Stellarium or SkySafari in general. Some of them are very detailed and go to a level of scientific article. I’m sure in most practical cases you do not need a pixel-level precision.
In my experience, it turned out that Insta360 cameras (I use ONE R) deliver pictures in a format which can be directly used in Stellarium and SkySafari without spending a lot of time for panorama creation and proper alignment.
If you have an Insta360 camera with the 360 module mod, you proceed as following:
- Consider making the picture in the dusk, and not in the dark time. In the dark time, the landscape will be very dark and not well visible in the app later.
- Put the camera on a tripod at a height which is roughly the same as the lens of you camera or telescope in your astrophotography setup
- Face the camera to the North, i.e. having the display of the base module looking to the South
- Using the compass app on your smartphone, make sure that the camera is leveled even and the geographic directions mentioned above are roughly adjusted
- Take a 360 photo with exposure and other settings put on automatic values. Taking the photo in the JPG format is fully sufficient
- Open the picture in the Insta360 Studio app on your desktop computer
- Select the “Flat” view mode. The picture should be shown like this. Check if the geographic direction are correct
- Export the picture in the JPG format. Doing that, set the hight to 1024. The width should be calculated automatically, and will probably be 2048
- Start PhotoShop. I guess the next steps work in any other image processing app in a similar way
- Create a new document with dimensions of the exported JPG. These are probably 2048×1024. Select the background to be transparent
- Add new layer and drag-n-drop the exported JPG onto that layer
- Activate “Quick Selection Tool” and select the sky outline closing the selection to include the whole sky area. Pay attention that elements which can block the view on stars will remain deselected and so become a part of “solid landscape”. These would be significant obstacles, like a house, constant sources of strong light pollution, e.g. sky glow form a city in a distance, and certainly all stationary objects along the border between the sky and the landscape on the horizon. It makes sense to ignore small selection details as well as rough edges to save time. Perfectionists can certainly make the selection 100% exact 😉 but I’m not sure this will change your plans to go to this site or not on a given evening 😉
- Go to “Layer”-> “Layer Mask” and select “Hide Selected”. This should make the selected sky area transparent, shown being filled with small rectangles
- Here you are done with image processing. Export the file as PNG. Be sure to select “Transparency” in export settings. Do not use the quick export for this, since it does not prompt for transparency settings. You can leave other settings on defaults.
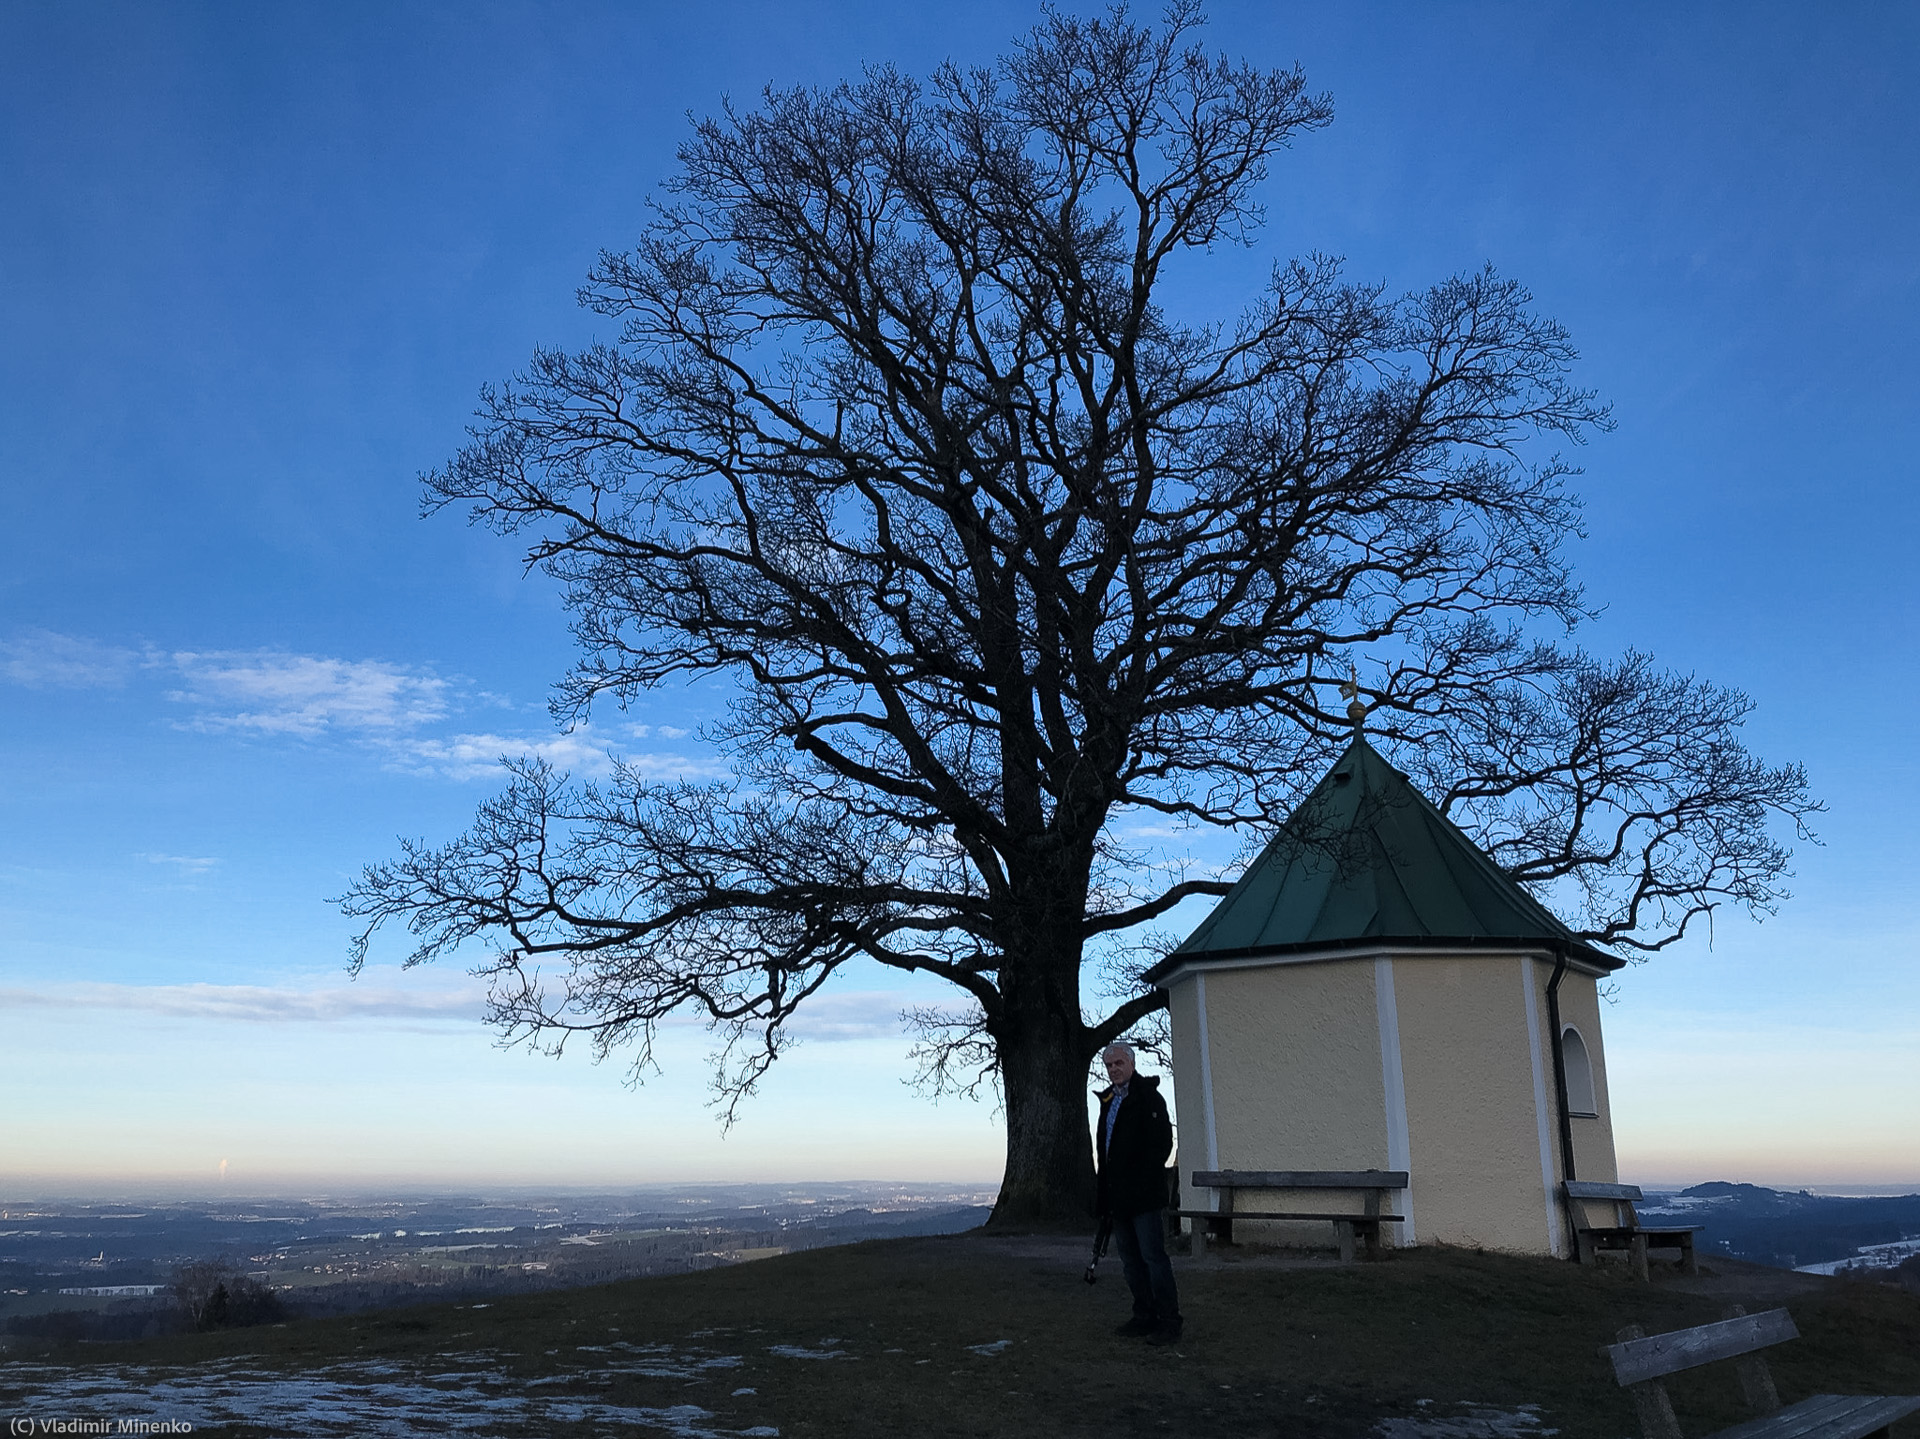
Following the above steps, lets make a custom landscape of t he this place. The picture below is a regular picture from the camera facing north:
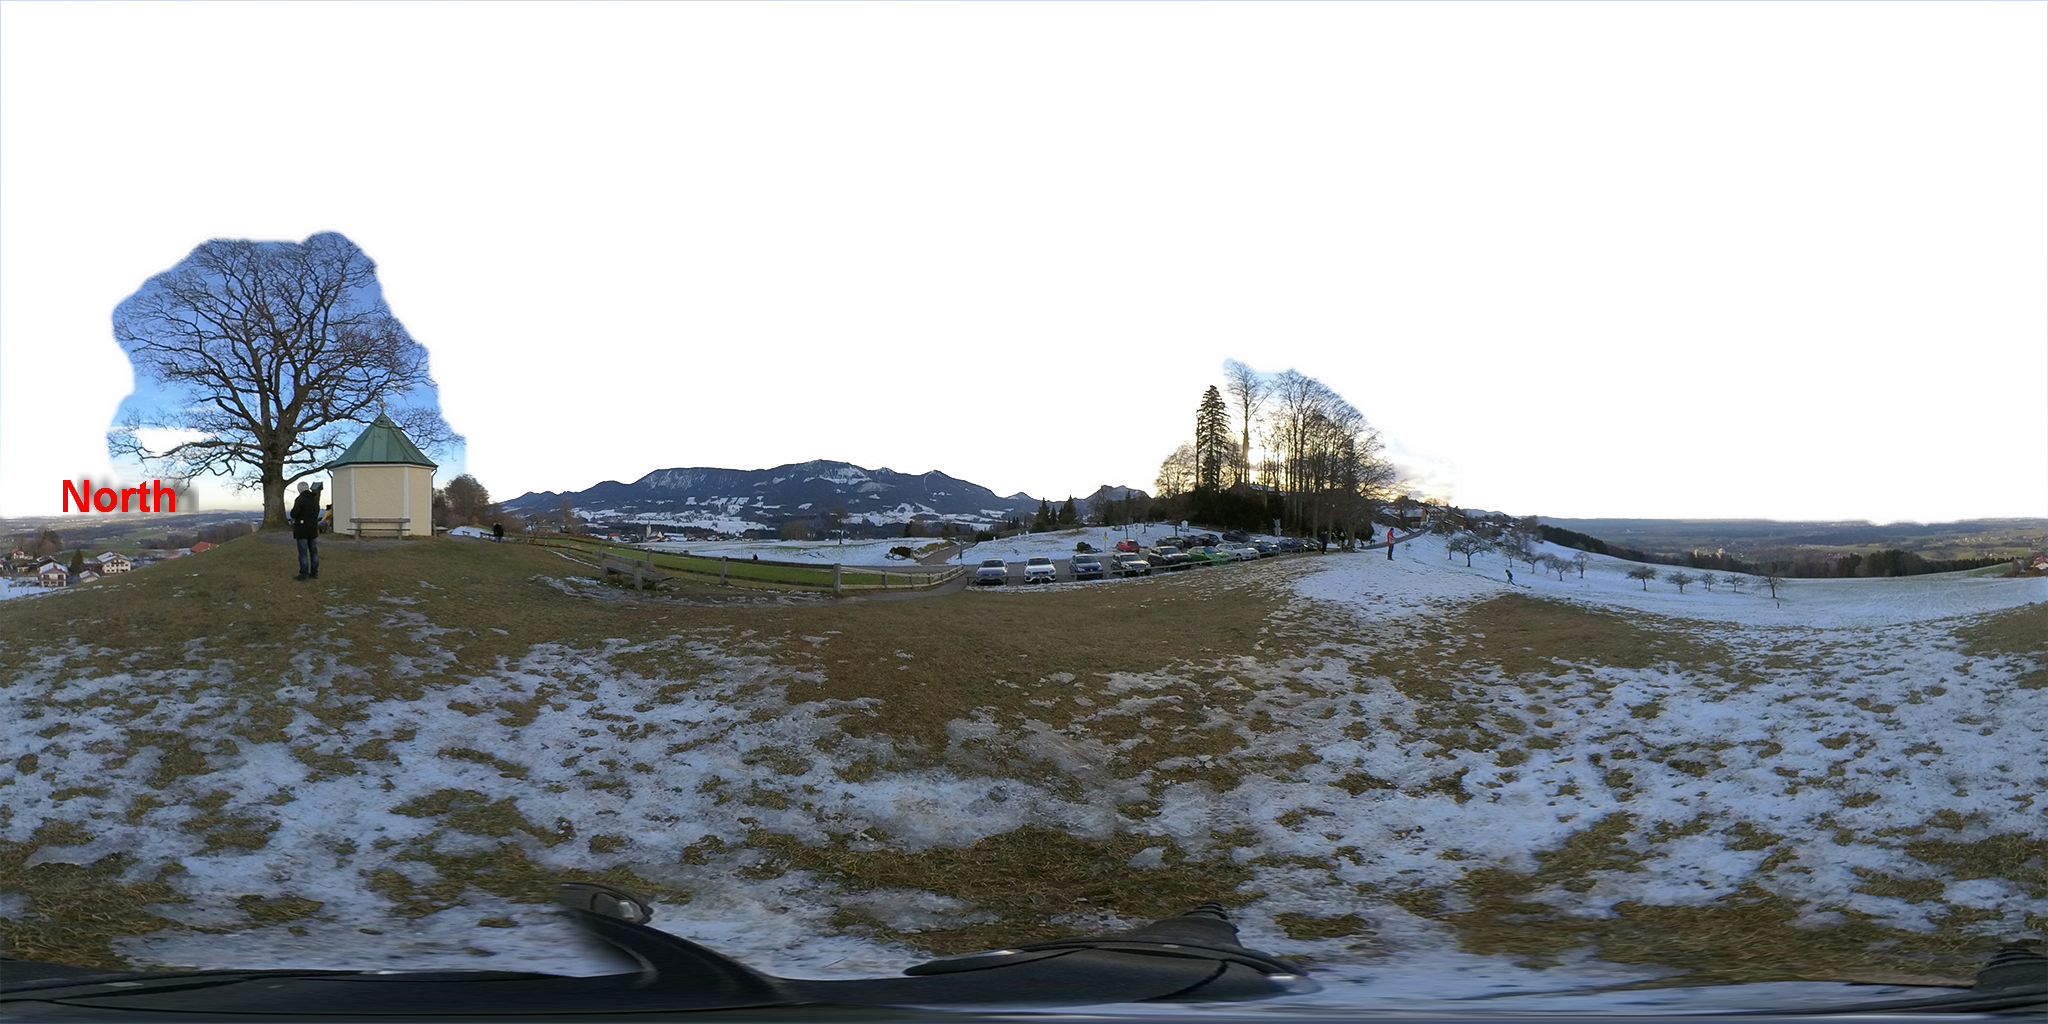
This is the 360 panorama picture processed in PhotoShop as discribed above:
The next step is to integrate the image in the apps.
Stellarium
Just for a reference, the detailed documentation about the integration of custom landscapes is located here. Try the steps below on the first run before you dig into details. I’m sure, this will be sufficient.
- Create a sub-folder with a short name of your location in the “landscapes” folder in the installation folder of Stellarium
- Copy the PNG image file into this folder
- In this folder, create a new “landscape.ini” text file with the following content and replacing the “<>” sections with your own values:
[landscape]
name = <nick name of you location>
type = sphericalmaptex = <the full file name of the PNG image file you just created>
angle_rotatez = 270
[location]
planet = Earth
latitude = <look up this values on Internet for your location, for me, it is: +48d10'0">
longitude = <as above, for me, it is: +11d48'13">
altitude = <loop up this values in meters on Internet for your location, for me, it is:: 512>
timezone = <loop up the spelling of this value in the settings for your location in Stellarium, for me, it is: Europe/Berlin>
That’s it! Lets see if and how it works. Open Stellarium, go to “Sky and view options” (F4), select the tab “Landscape” and select your location from the list on the left. Make sure that markings for geographic directions (East, North, etc.) roughly fit the actual situation at you place:
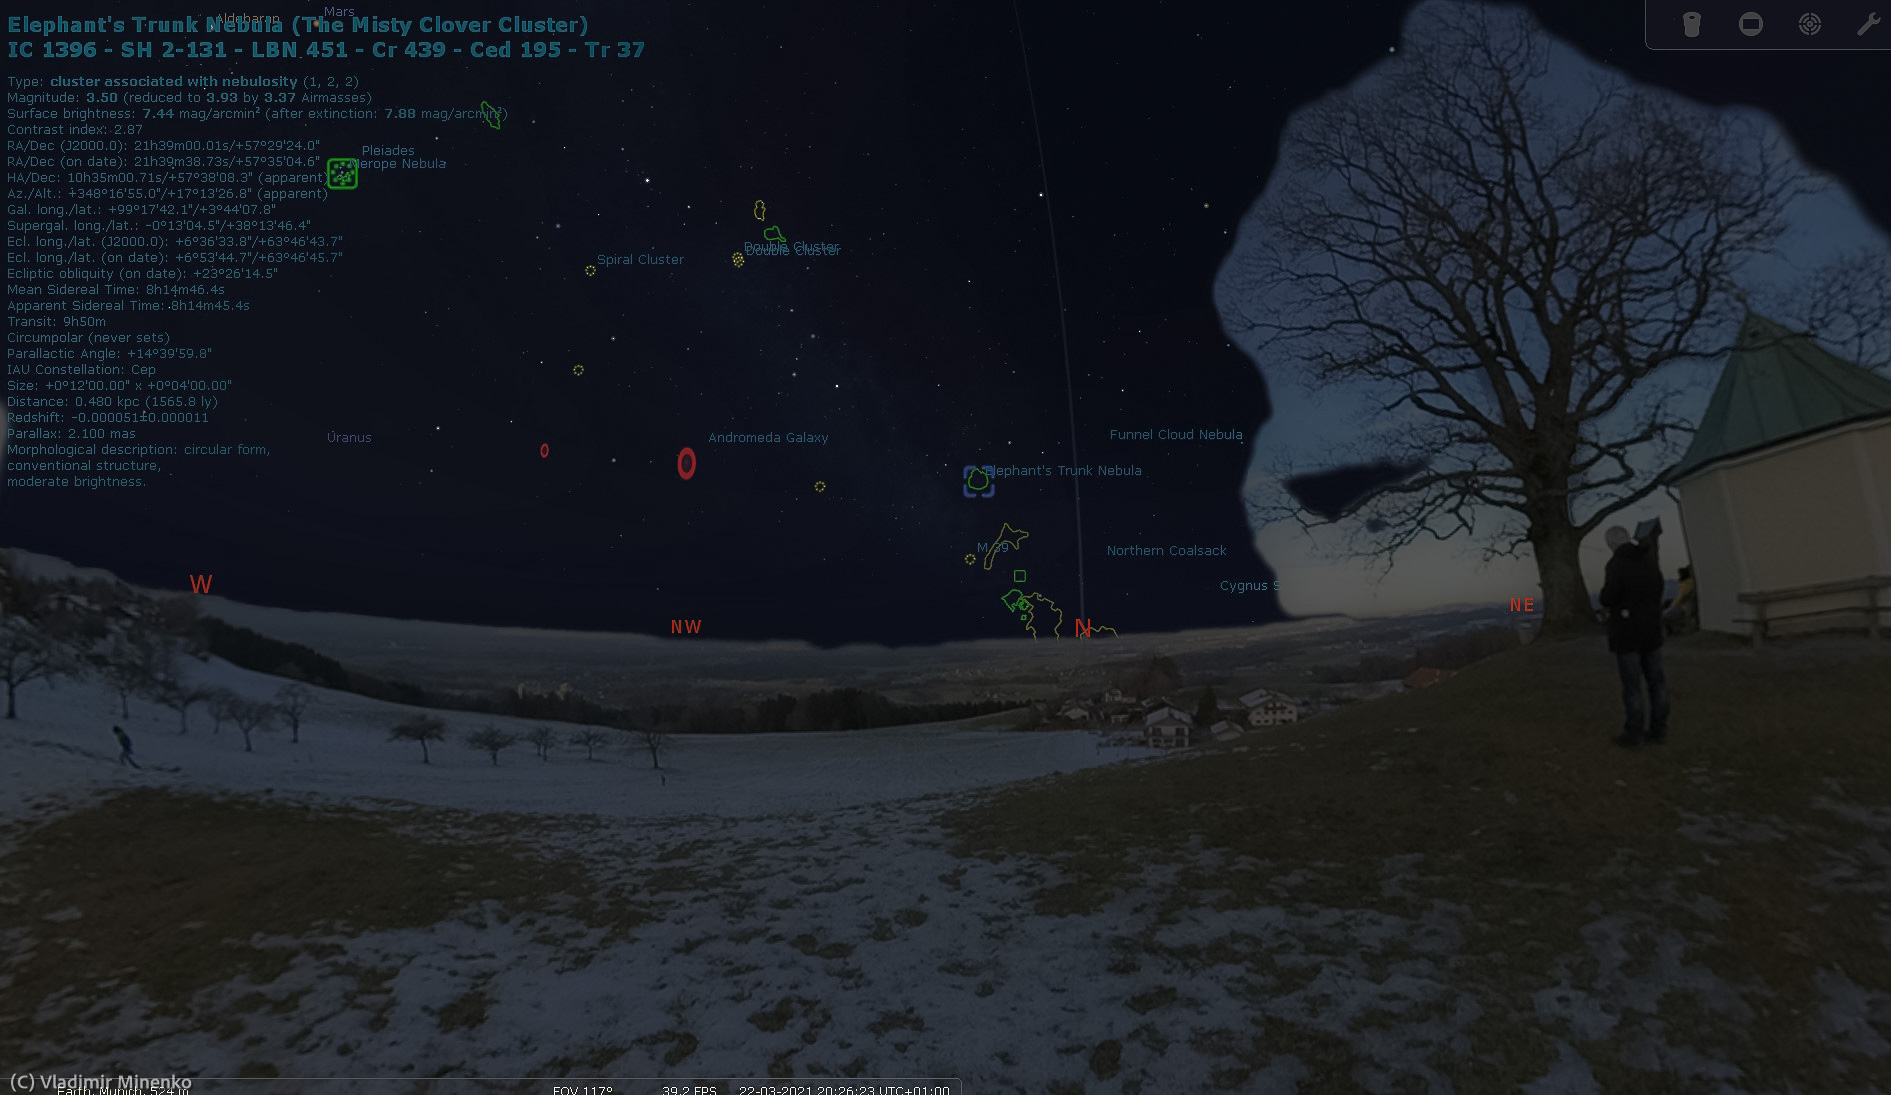
The value 270 of the angle_rotatez parameter in the landscape section rotates the scene in 270 degree clockwise and aligns the camera directions as desicribed above in a way allowing to use the same panoramic picture in both applications. If you missed the right directions a bit, you can rotate the scene by changing the angle_rotatez parameter . For example, adding “15” will rotate the scene 15 more degrees clockwise. IMHO, small deviations do not matter, since they will not change your plans for this night a lot.
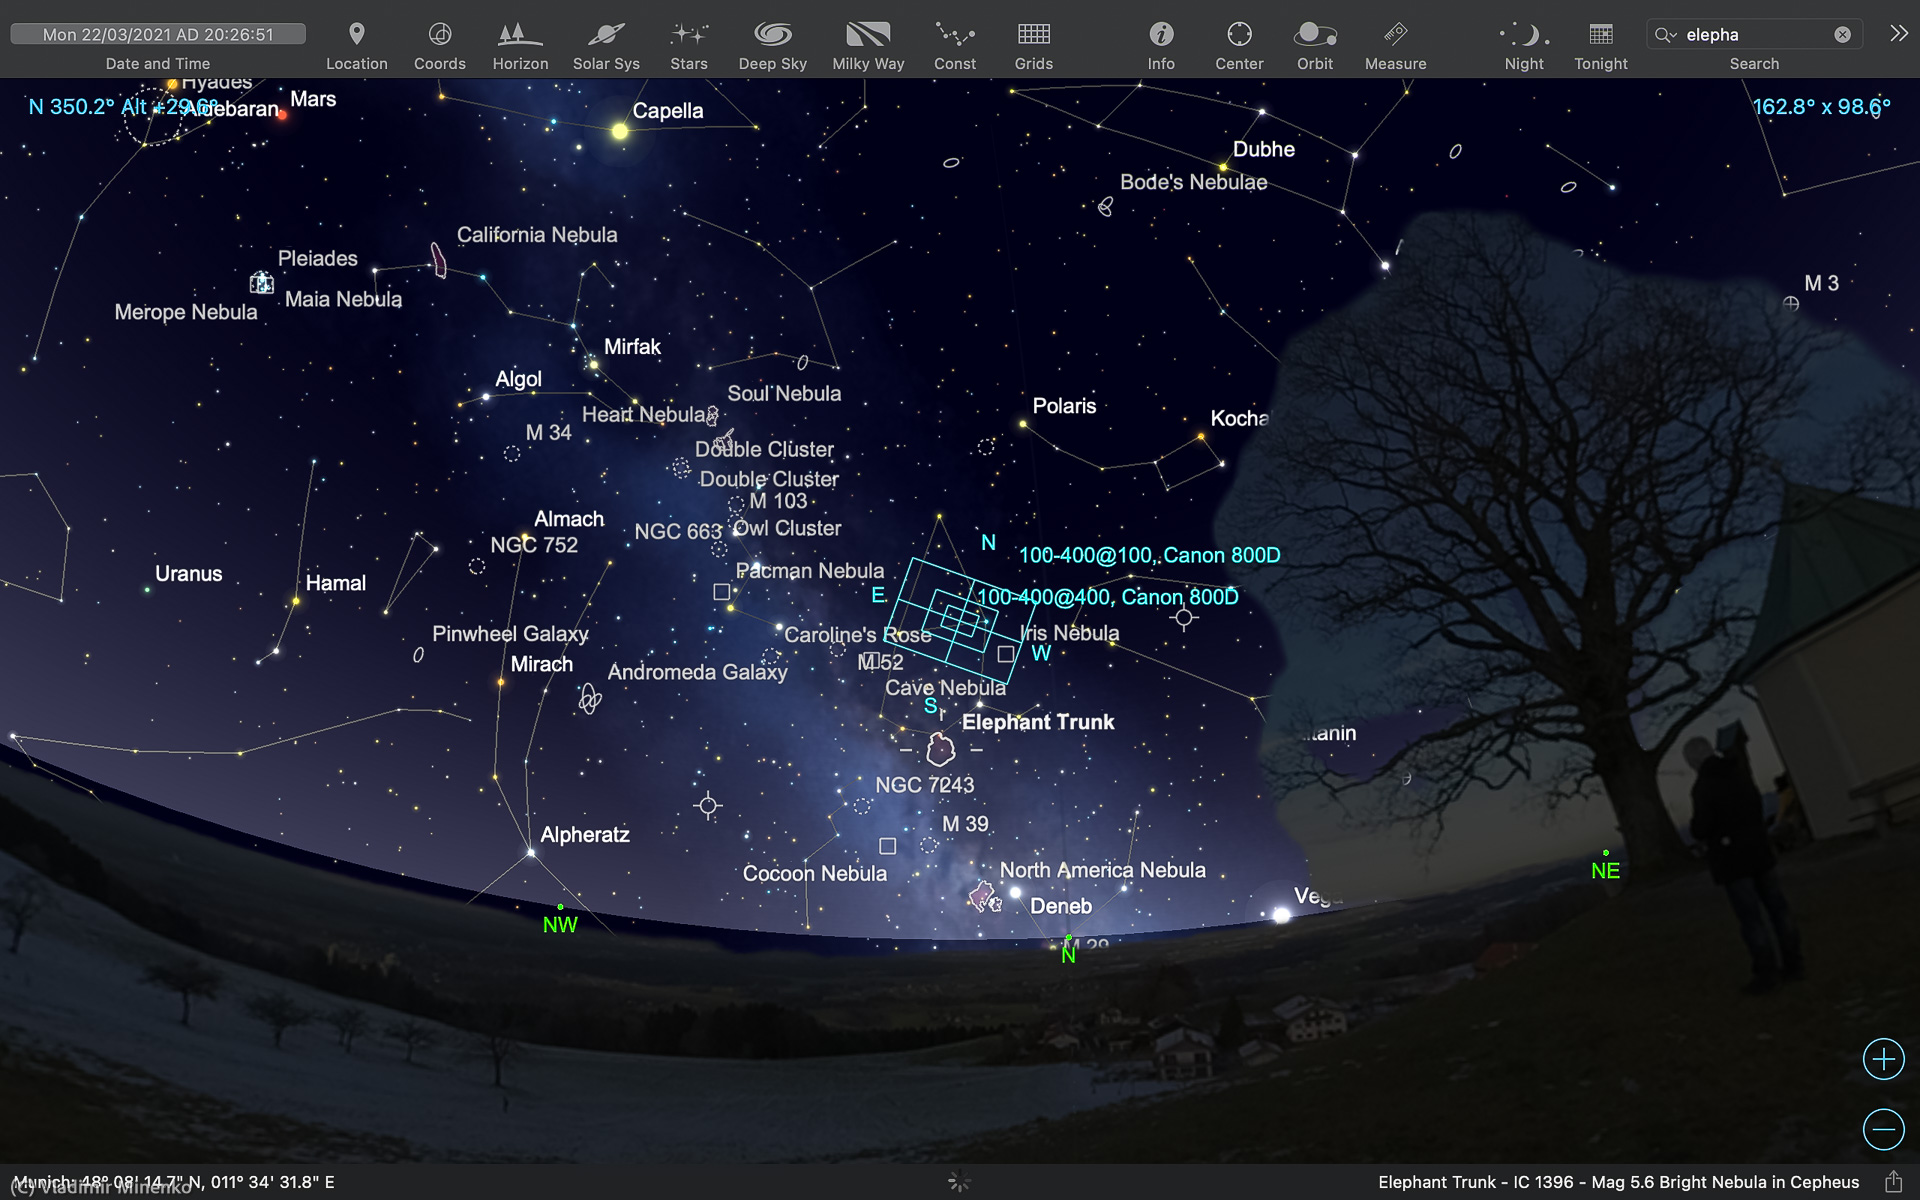
Sky Safari
In Sky Safari, the related feature is called “Horizon Panoramas”. The detailed customization steps are documented here for mobile devices. On MacOS, you either copy the PNG file into the folder “/Applications/SkySafari 6 Plus.app/Contents/Resources/SkyImages/Horizons” or use the Application UI to add the PNG file. For this, you click”(in SkySafari version 6.7.2 or later) the menu button “Horzon”, select the checkbox “Show Horizon & Sky” and add the PNG file with “+ ” to the list under “as Realistic Image”. The location name will be taken from the name of the file and shown in the list in the scection “Show Horizon & Sky”:
0 Comments