Assembly and User Instructions for the Mounting Kit for ZWO ASIAIR and EAF Belt Drive for TS-Optics CF-APO 70 mm f/6
This the the fist OTA with which I designed the series of the mounting kits placed on the focuser body and sitting in the holes of the guide scope clamps.
Mounting of this kit takes 15-20 minutes in the first time. You will need 2.5mm and 3mm hex screw drivers. The pulley might need a smaller (1mm or 2mm) hex screw driver.

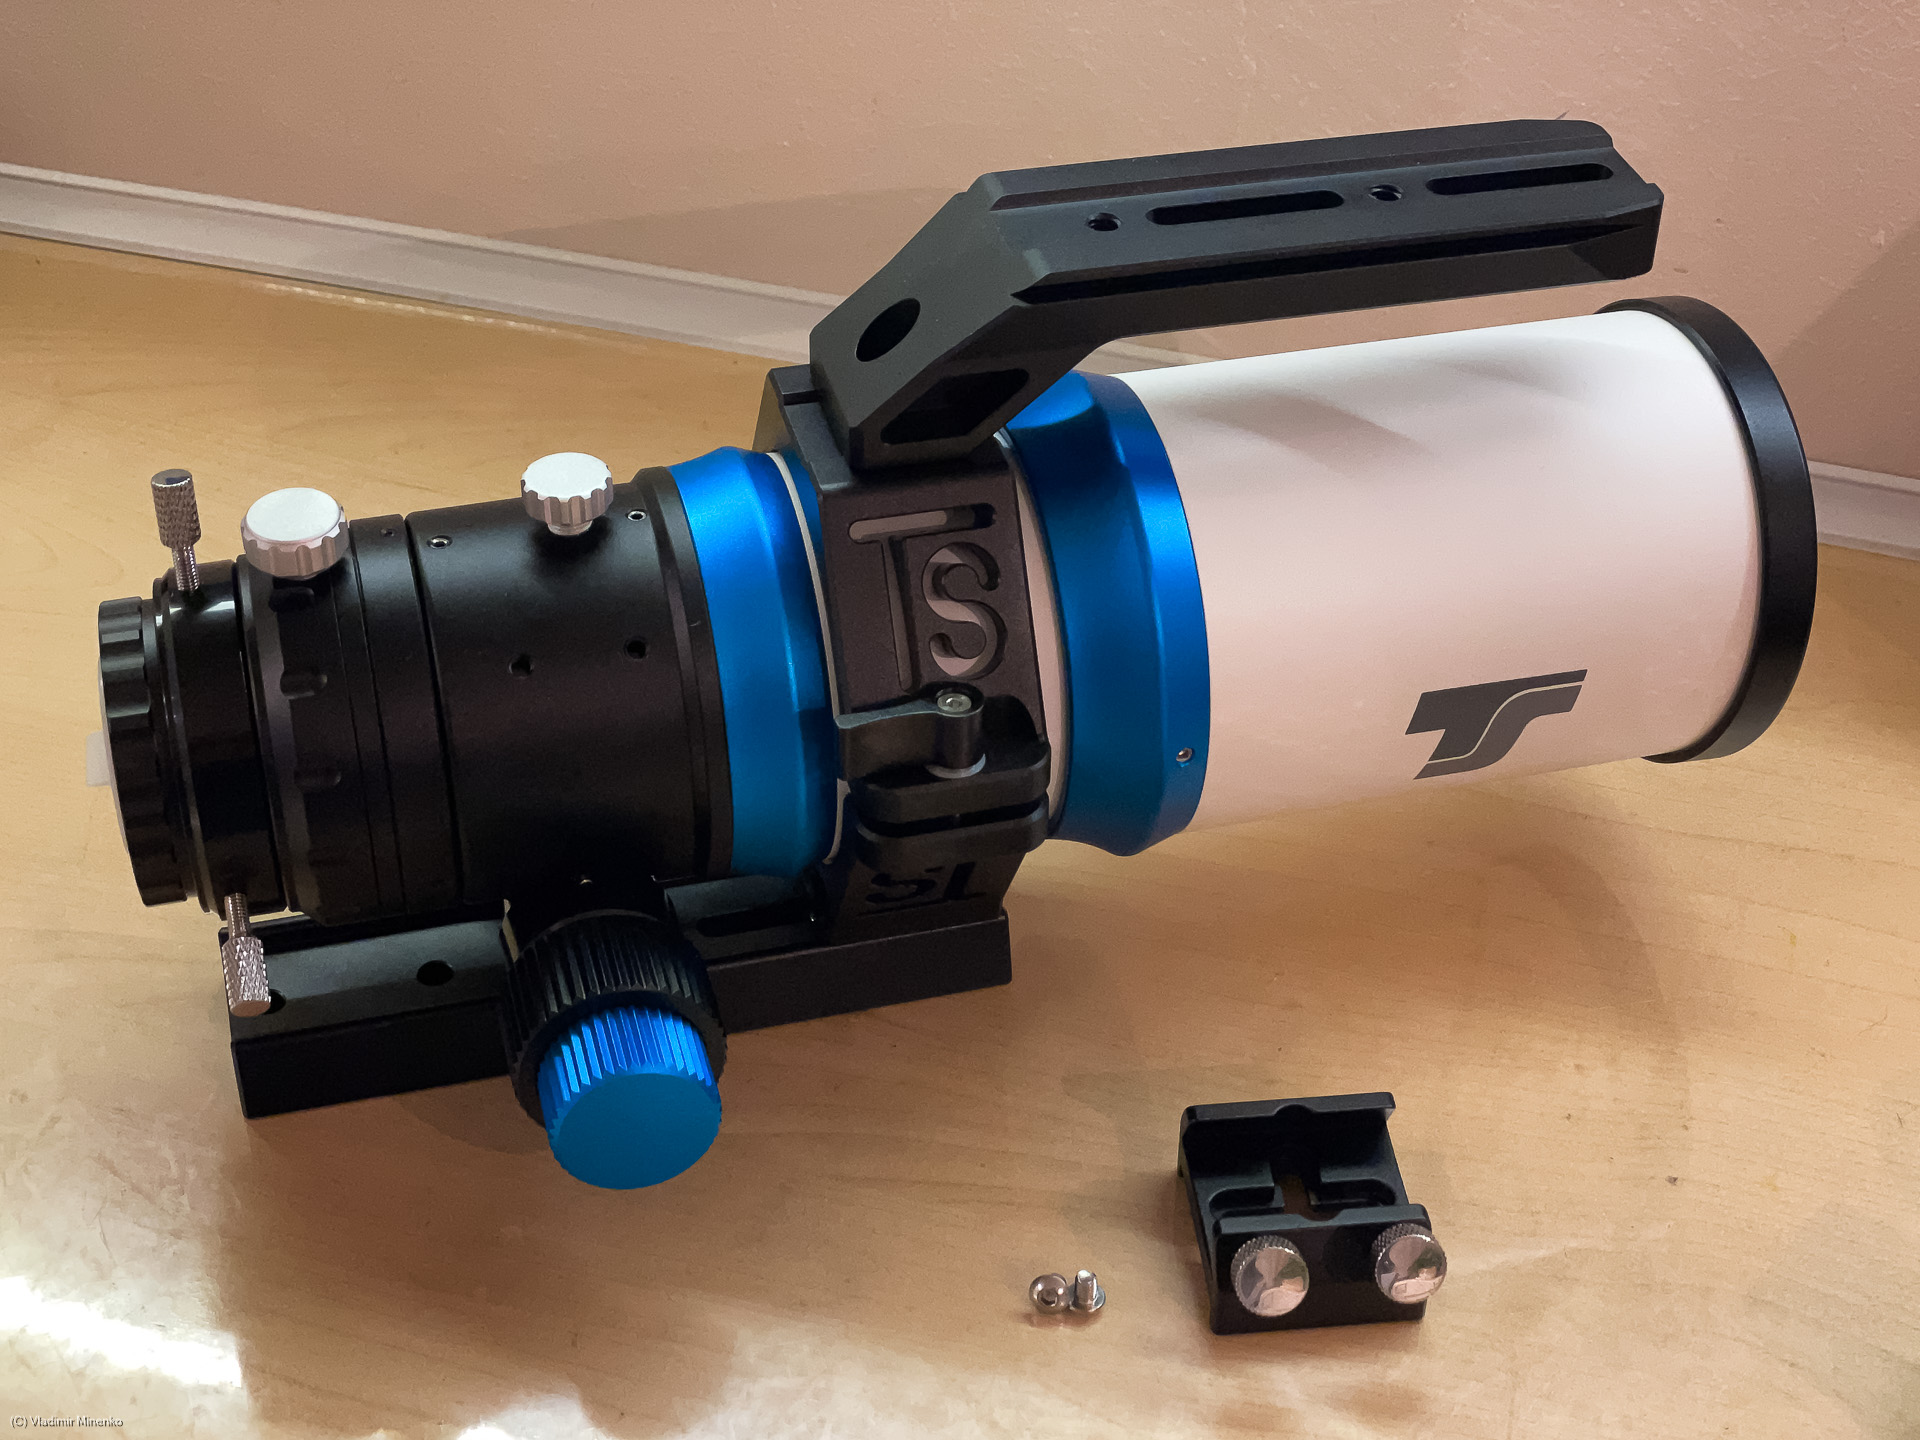
This is the TS CF APO in the 70mm version in the initial configuration.

The first step is to remove the guide scope / focuser base and clamp. It will be placed and used on another location. You also need to remove the screws on the other side of the focuser body which close the holes for mouting this clamp another side.
These 4 holes are used to mount the main frame of the mounting kit. Use 4 round head M4 screws for this.
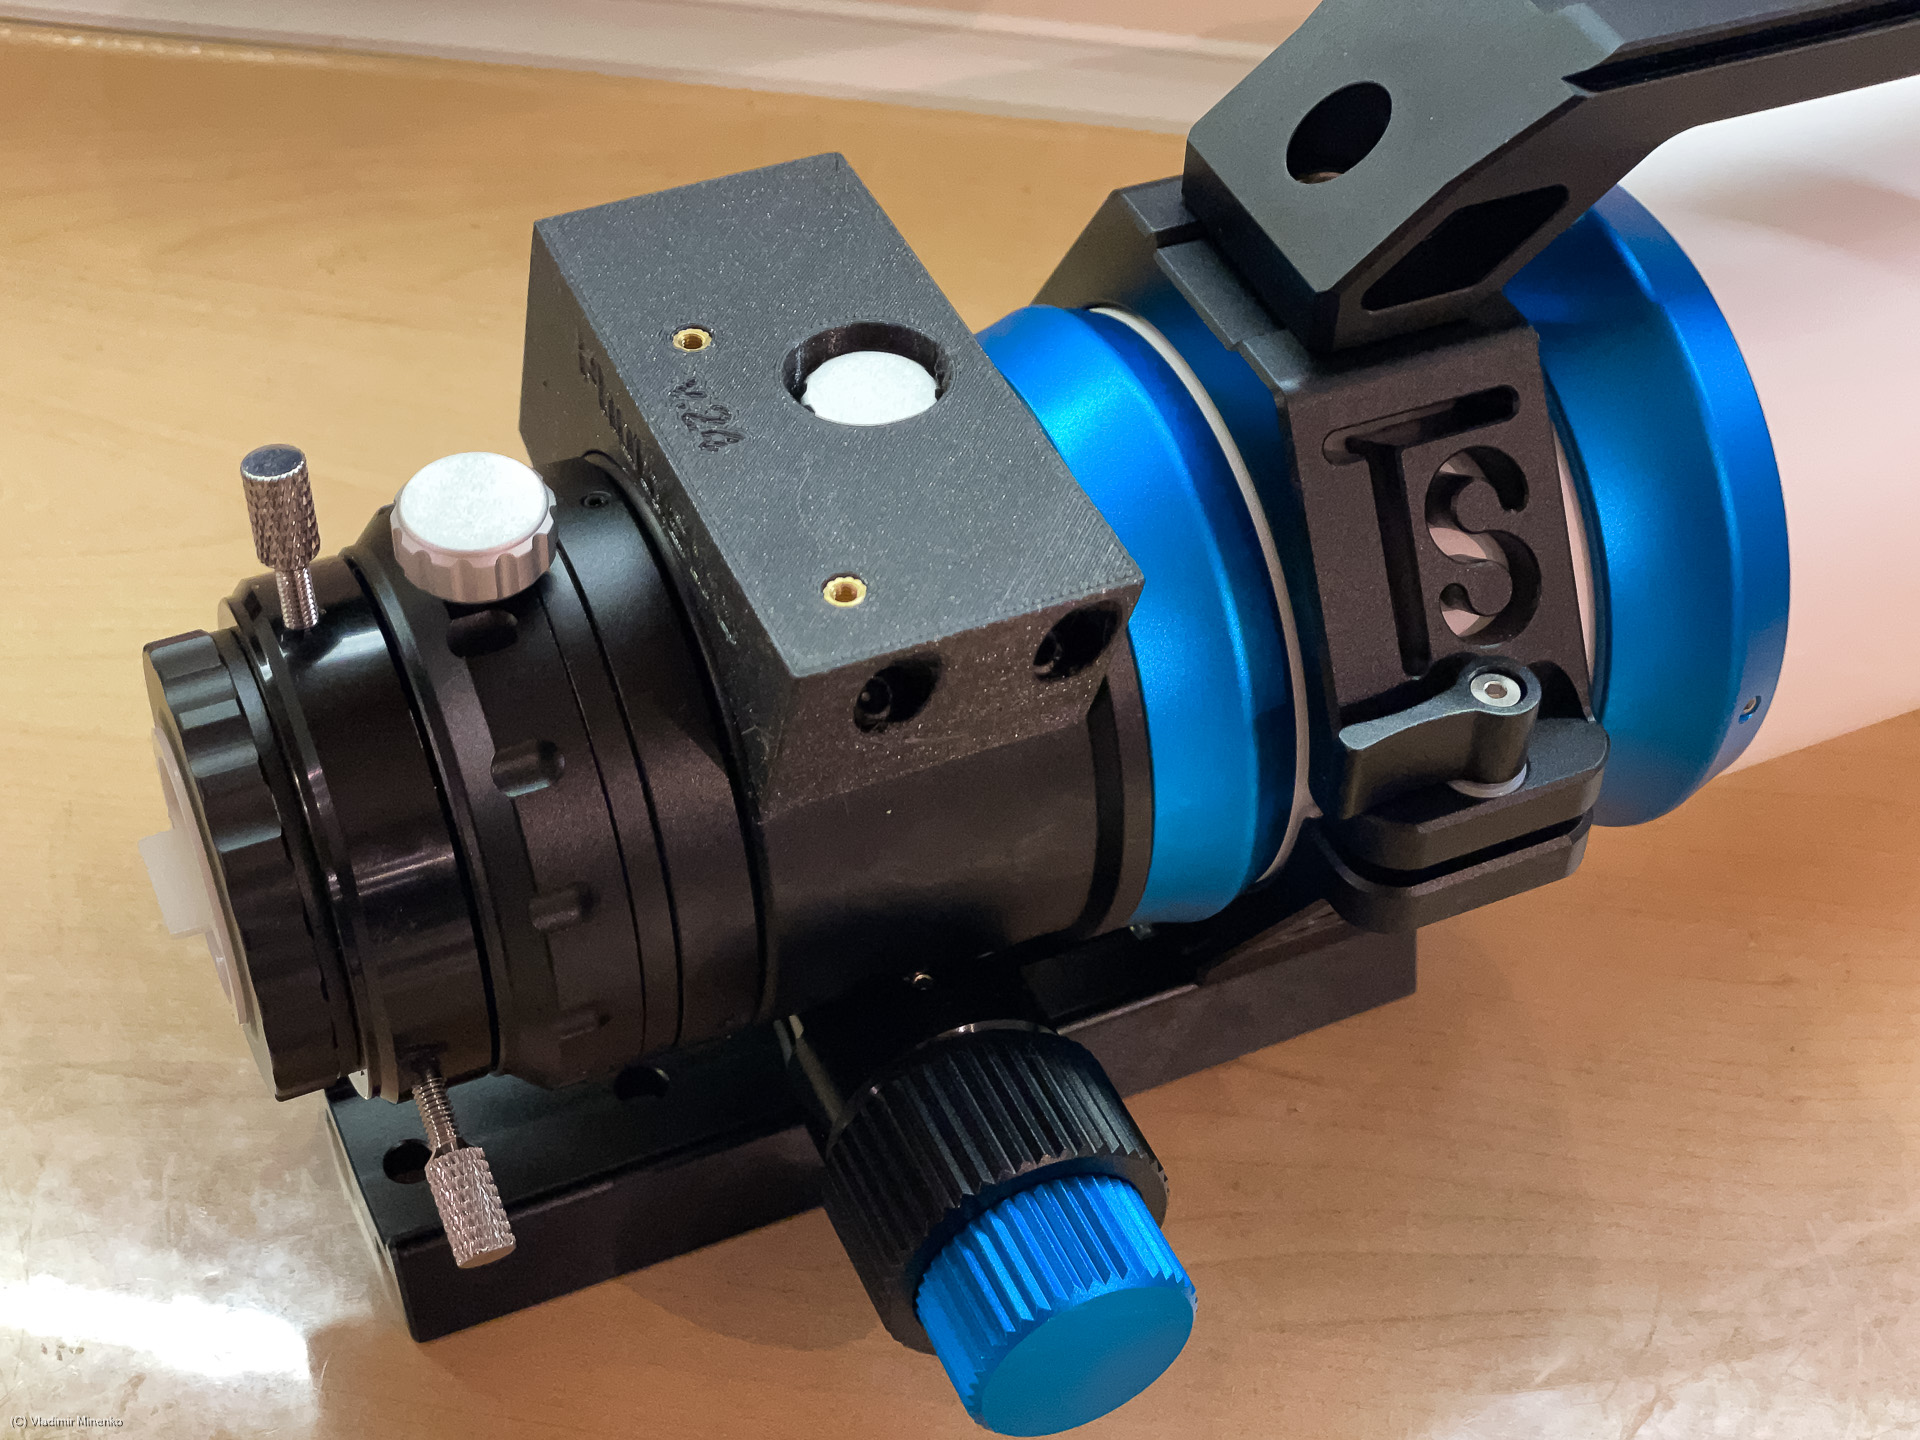
Make sure that you slightly open the focuser lock screw. This screw will be hidden in the main frame. Its functionality will not be needed since the focused position will be hold by the belt drive.
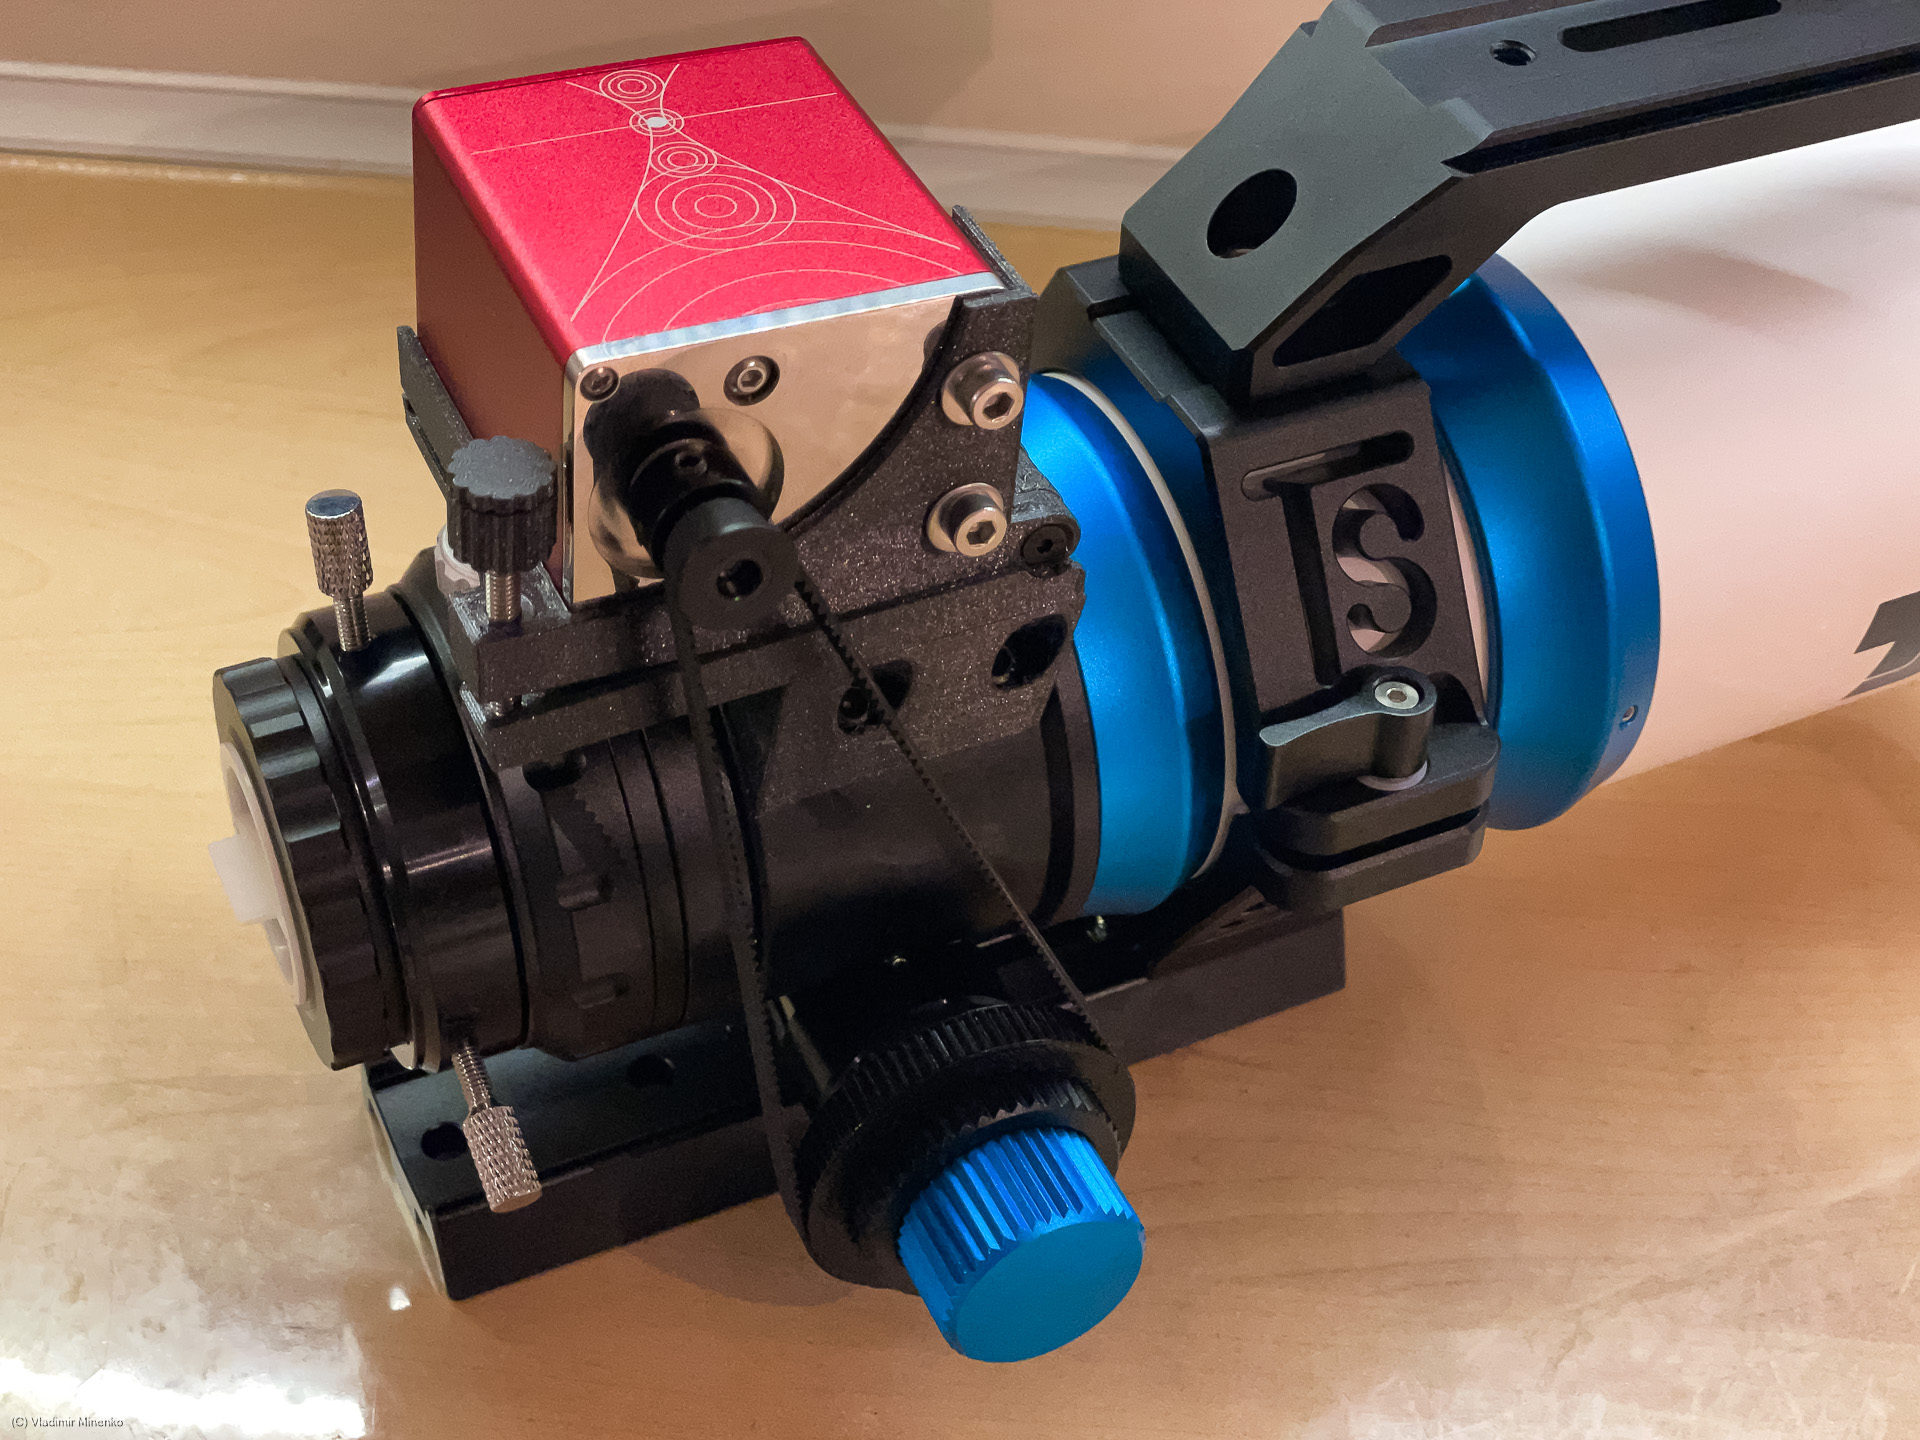
As next, we place the EAF holder on top with the two short, flat head M3 screws:

Mount the pulley on EAF and EAF on the holder:
 The kit uses a belt adapter. It converts proprietary rills on the main focuser knob into a GT2 pulley. Install the belt and use the tension adjustment screw
Now we switch the sides and go to ASIAIR. ASIAIR can be mounted in various orientations:

Putting plugs towards the top side saves the space on the bottom:

The horizontal orientation is probably the most compact one, but may put the USB plugs too close to the camera or a filter wheel so they might not have enough space:

The ASIAIR holder is inserted on the side of the main frame:

You need to mount the holder on the ASIAIR first. Use the two short flat head M4 screws for this.
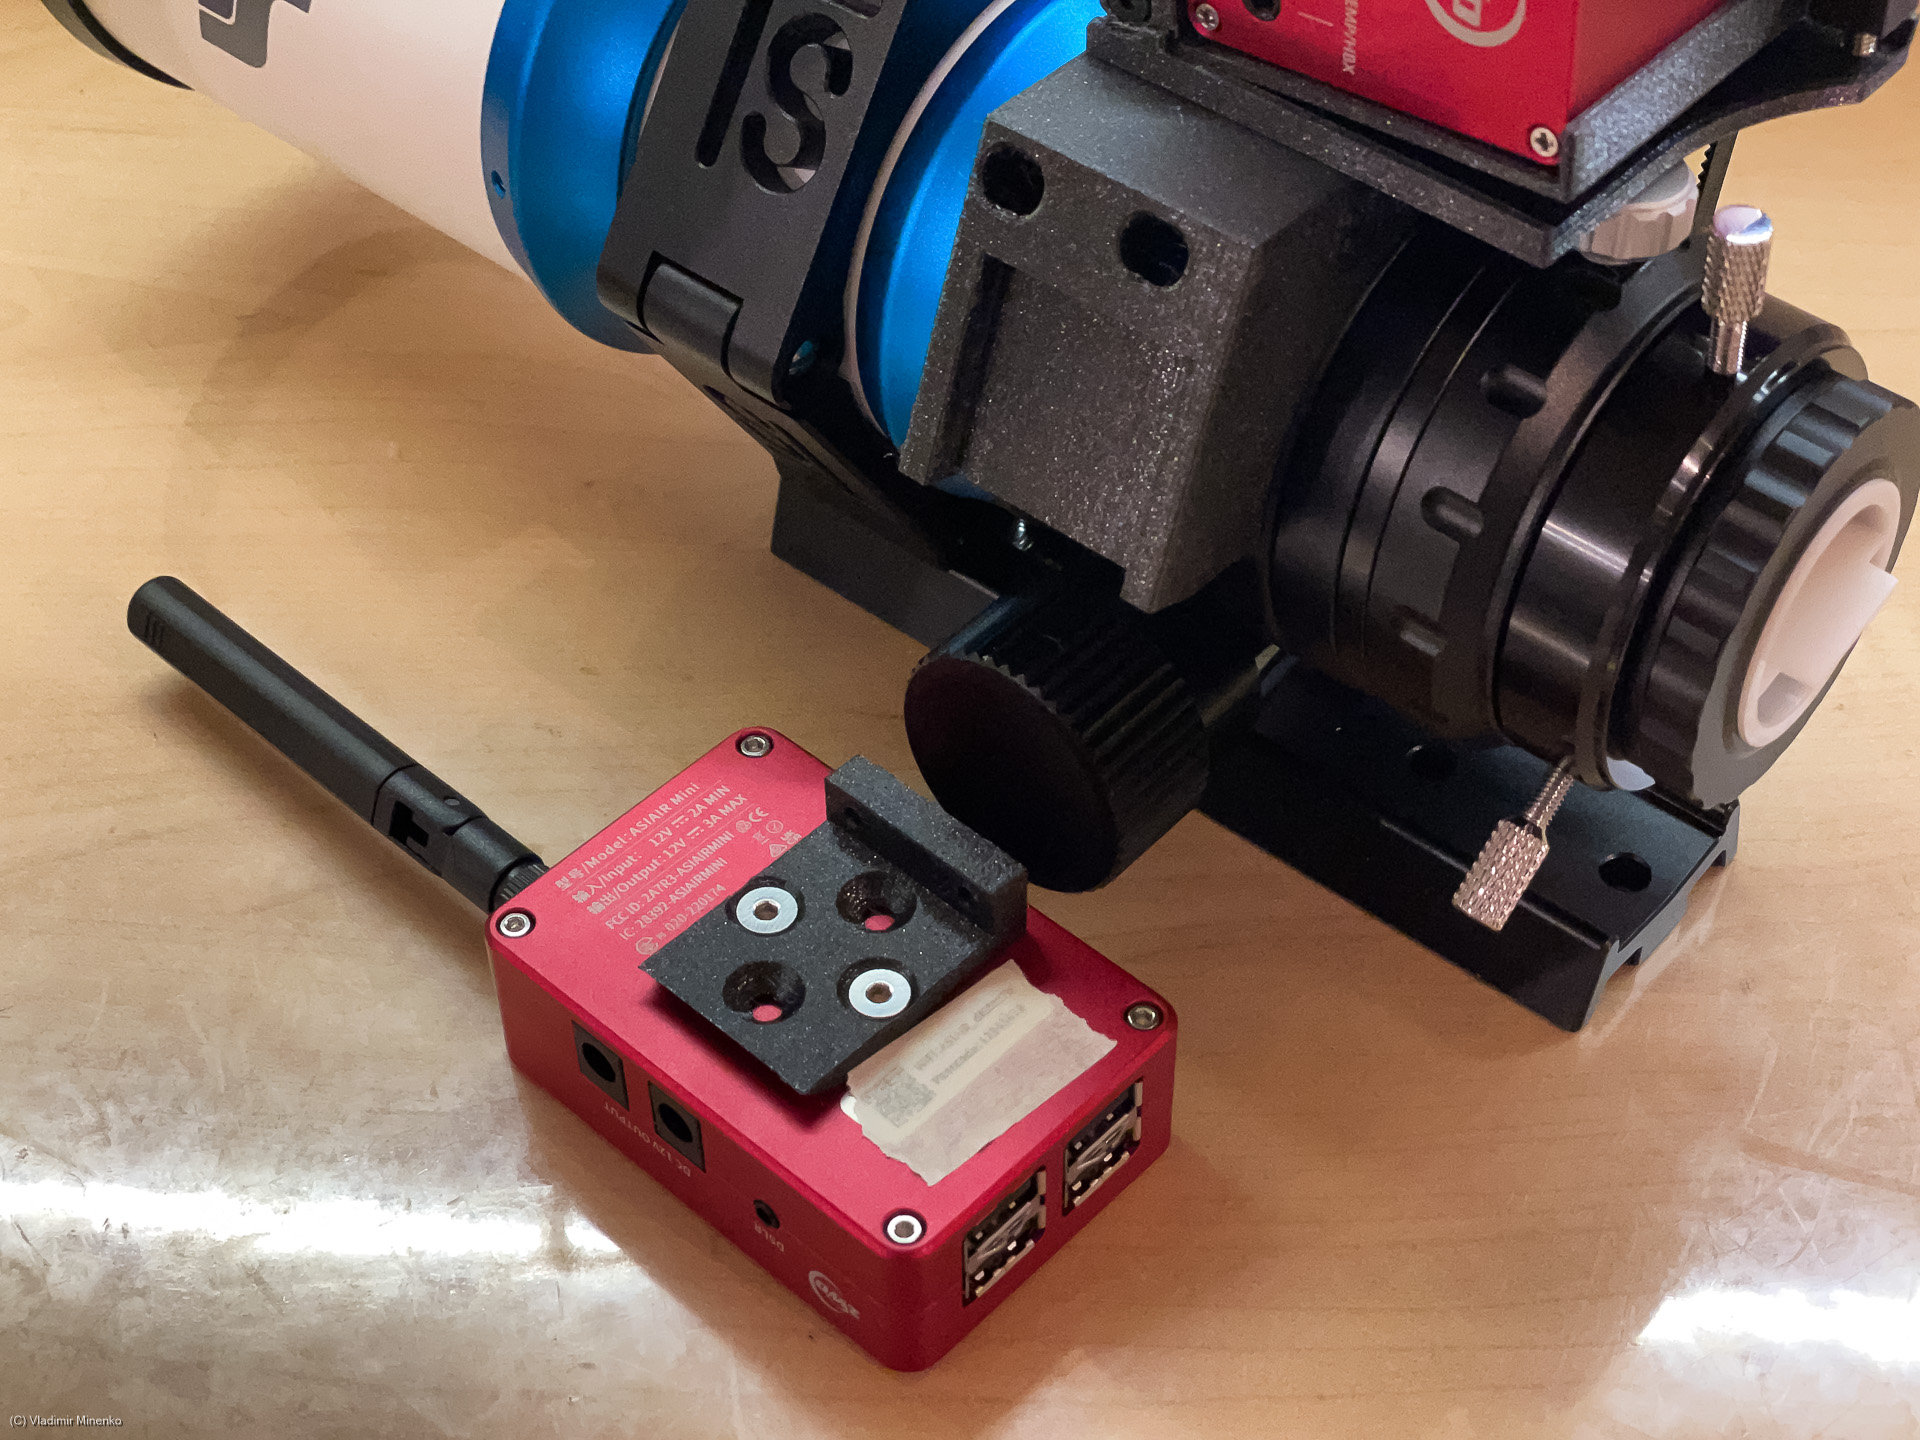
The ASIAIR holder will be fixed on the bottom side of the main frame:

By two mid-size flat head M3 screws:

There are two options to mount a guide scope. Both use the base which we unmounted in the beginning. You can place a guide scope in the handle or directly on the OTA brace ring. Two different adapters are provided for this.
The smaller one is mounted on the handle with the M6 flat head screw:

The base is mounted on the adapter with the same screws with which the base was originally mounted on the focuser body:

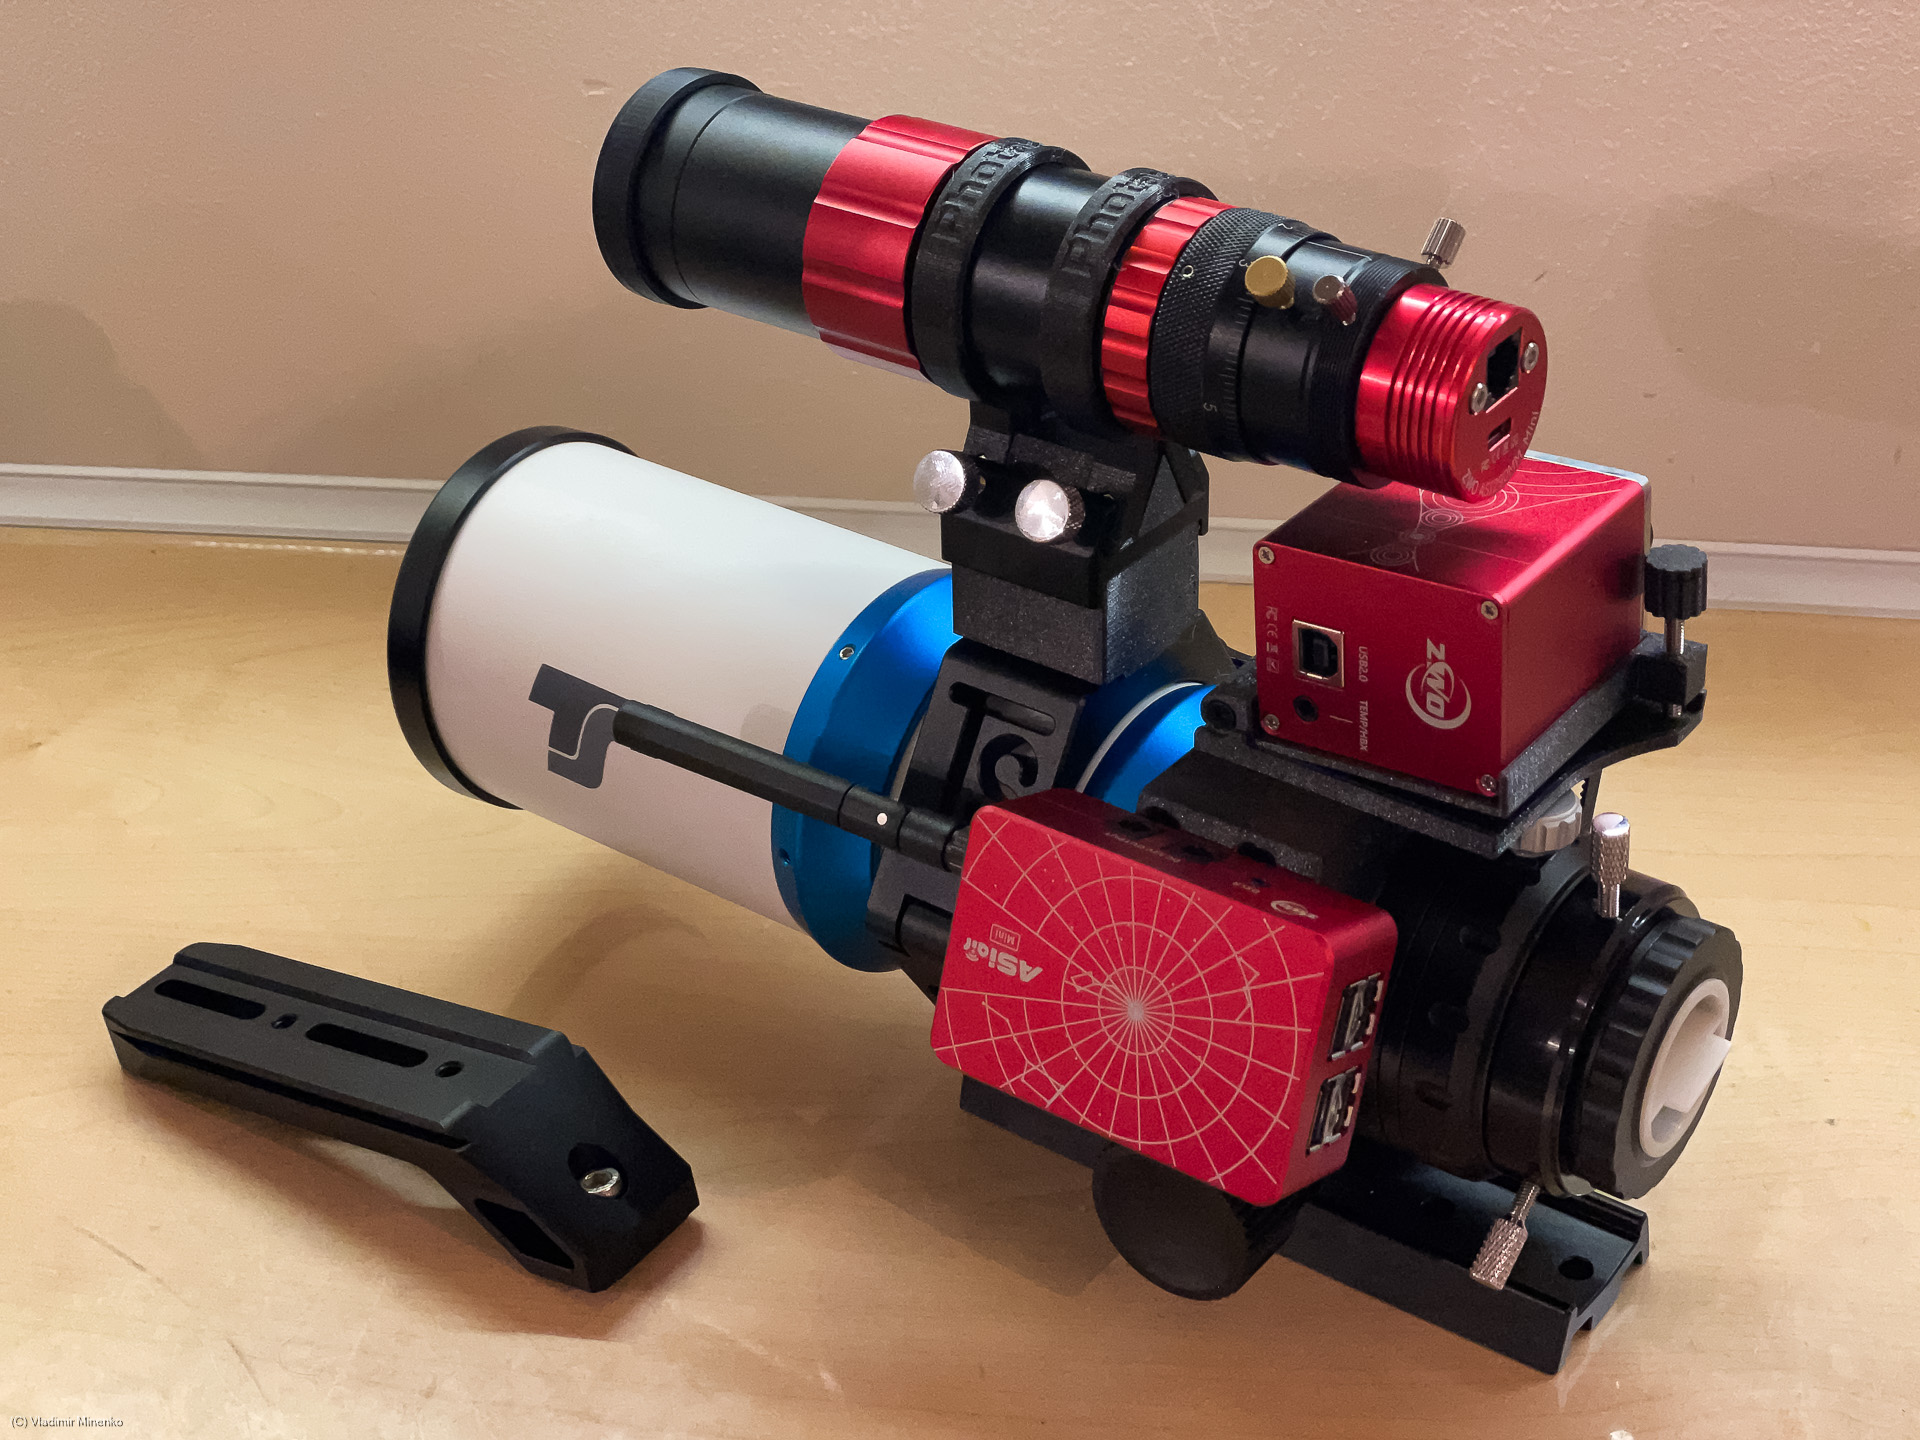
This is how it looks in action:

The larger adapter is used to mount the base directly on the OTA brace ring:

In this case the handle is not used:

This is how the other way of mounting the guide scope looks in action:
We are done now! Your new gear is ready for imaging!
The kit is available in the Photastro shop under this link.
Comments
Got an opinion on this topic or found a mistake? Please add a comment.
0 Comments