Assembly and User Instructions for the ZWO ASIAIR Mounting Kit and EAF Belt Drive for Askar FRA 300 Pro
This page goes through the assembly steps for this mounting kit. We want to get compact and tidy gear setup.

You will need three hex allein keys, ZWO ASIAIR (Mini is used here), a EAF with its mounting screws.

As first, we remove the clamp and the extra screws from the focuser.
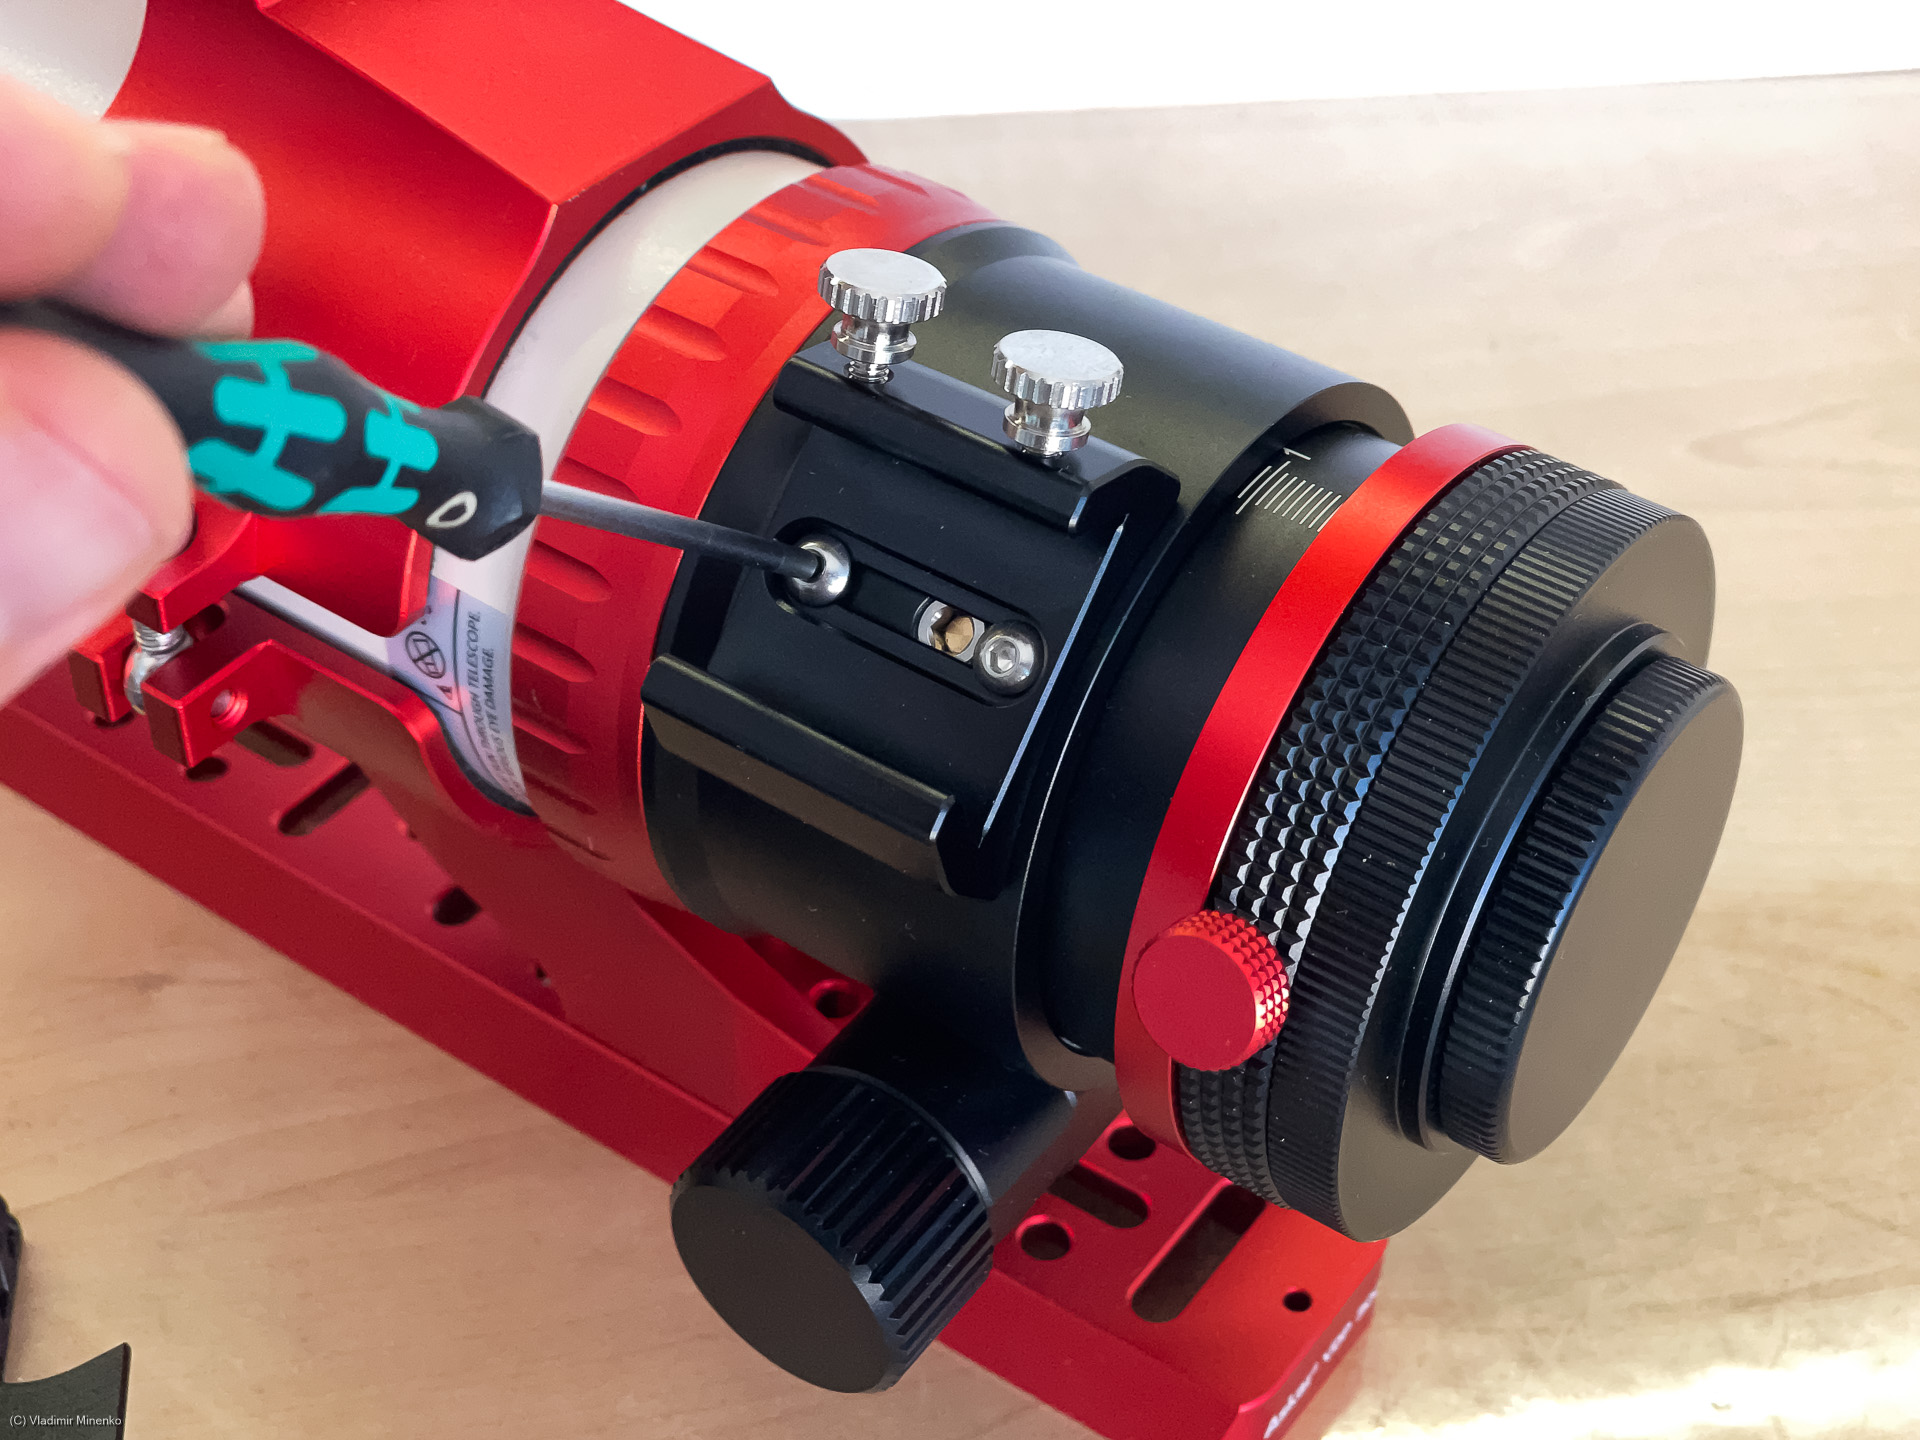
The main frame of the kit is placed on the focuser. The holes of the guide scope clamp are used for mounting. Use the TBD M4 screws for this.

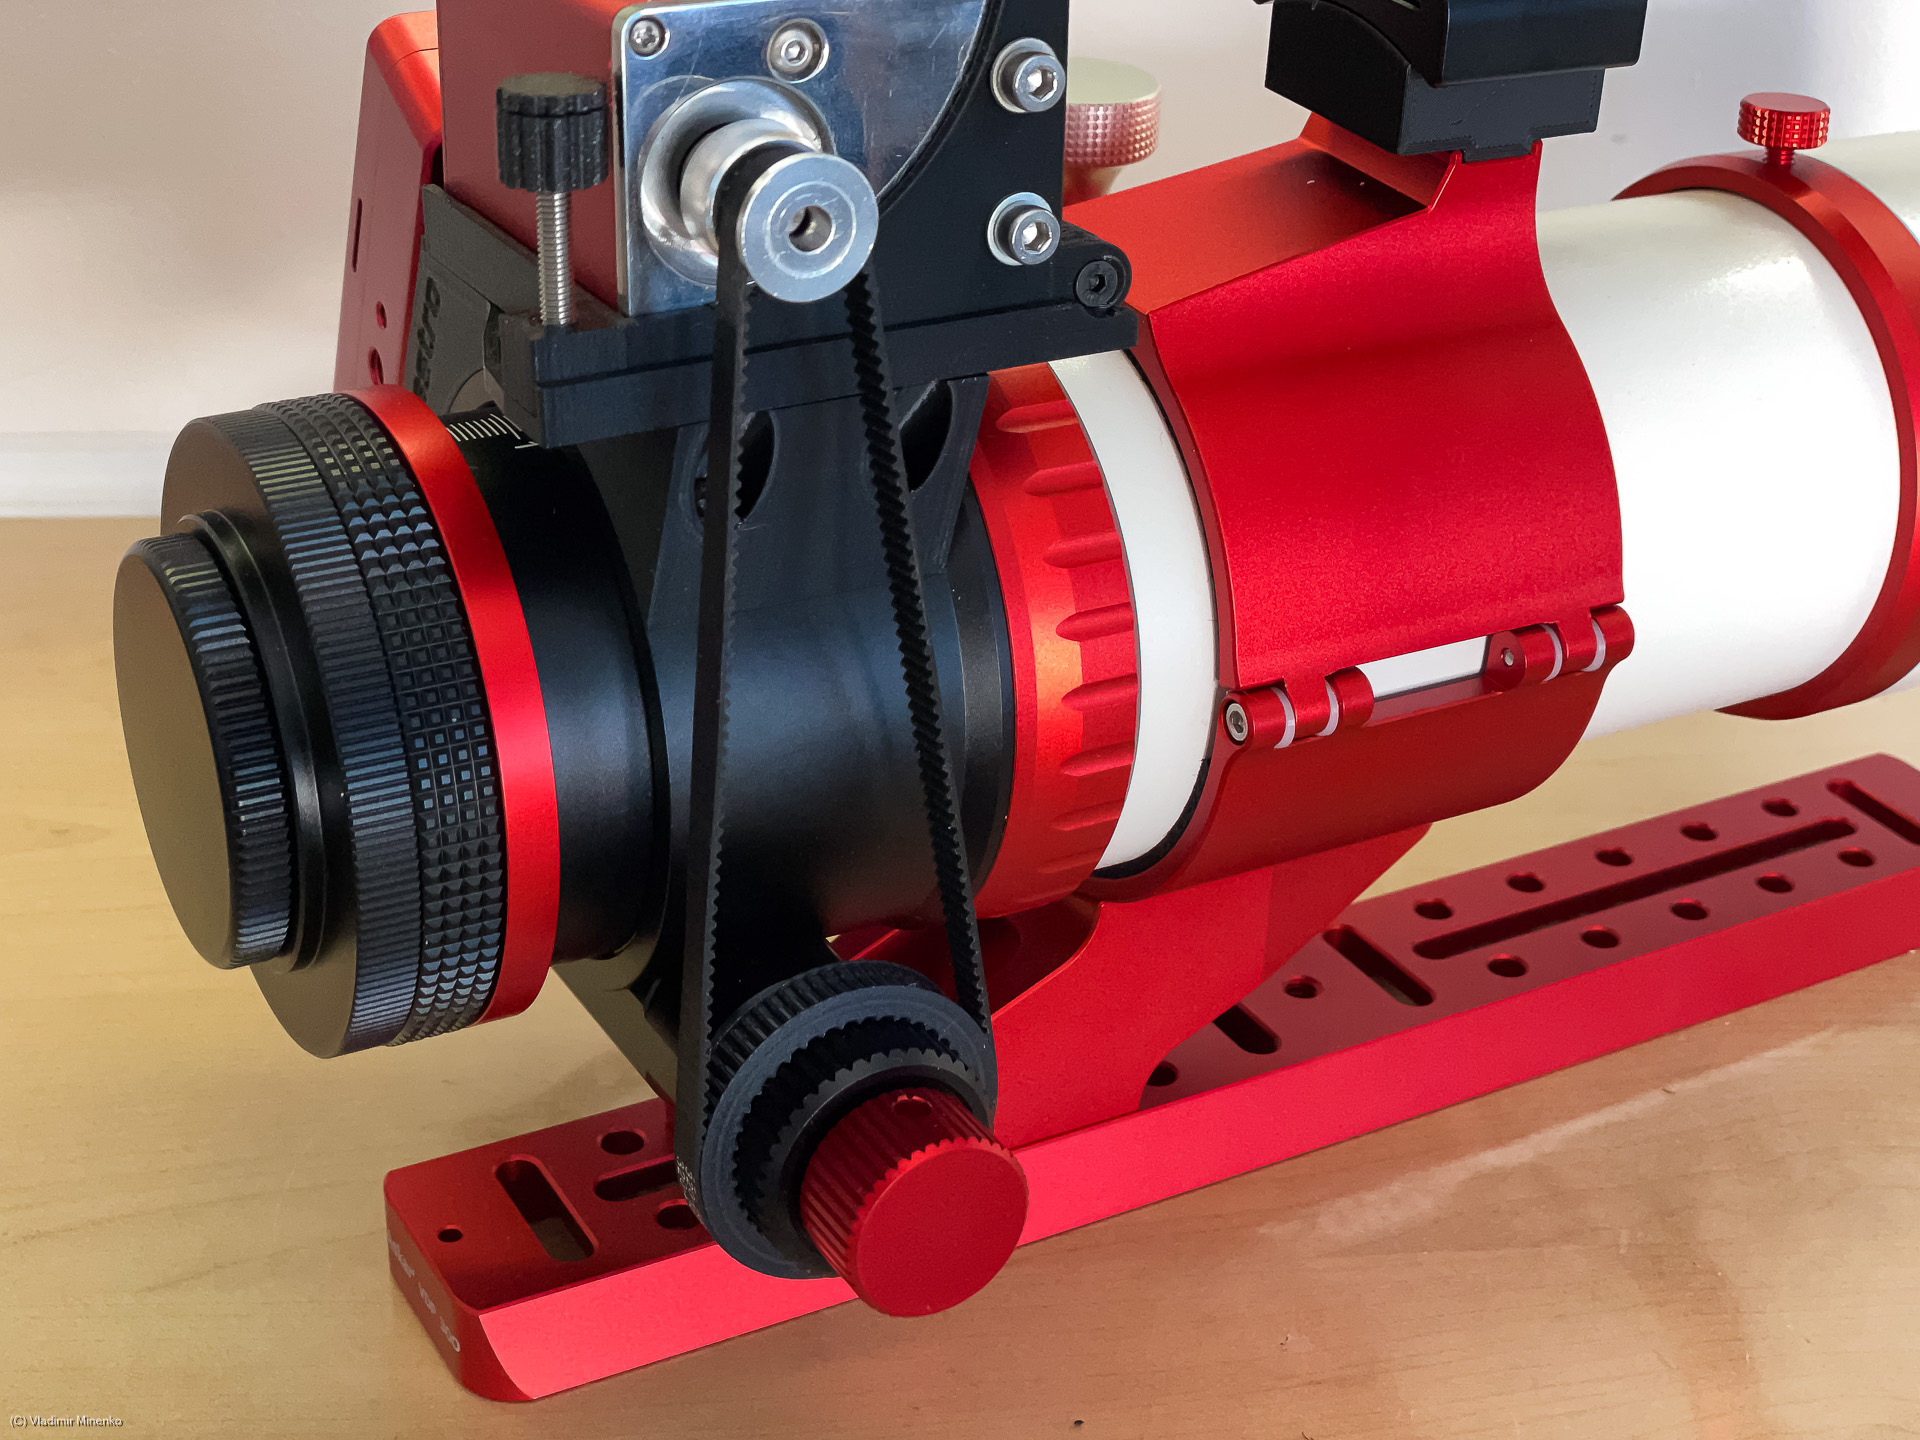
After this, we mount the plate of the EAF holder on the top side of the main frame. Use the short TBD M3 screws for this

Now, you mount the EAF into the fame of the holder. Use the M4 screws which are provided with the EAF for this.

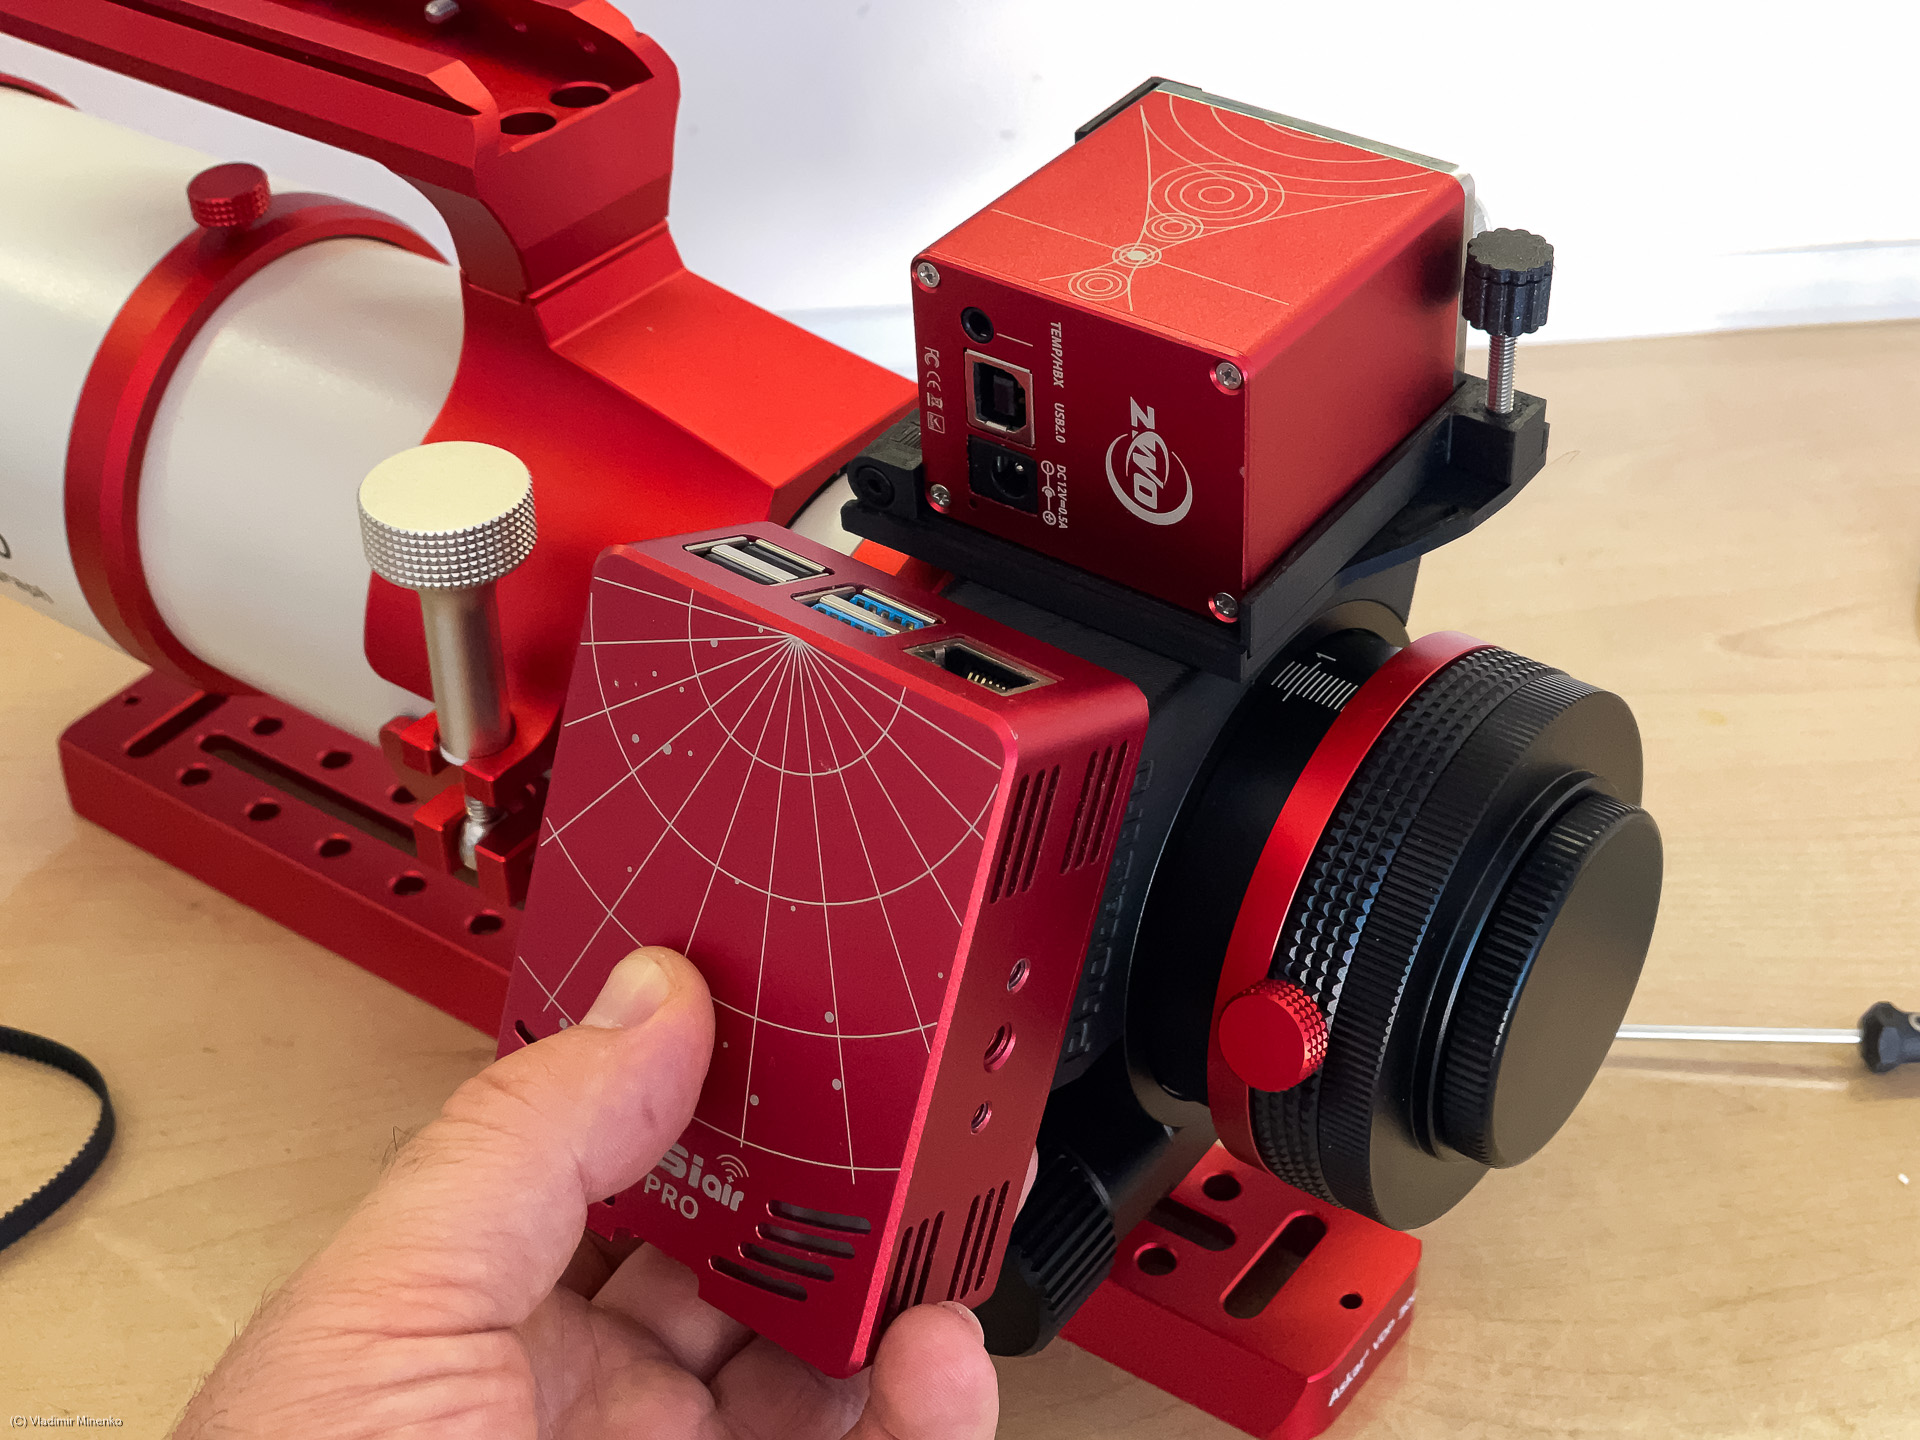
As next we turn to the side where the ASIAIR will be placed. It can be mounted in multiple orientations. The most popular would probably be the one where connectors go towards the camera side. This would allow a very compact cable routing.

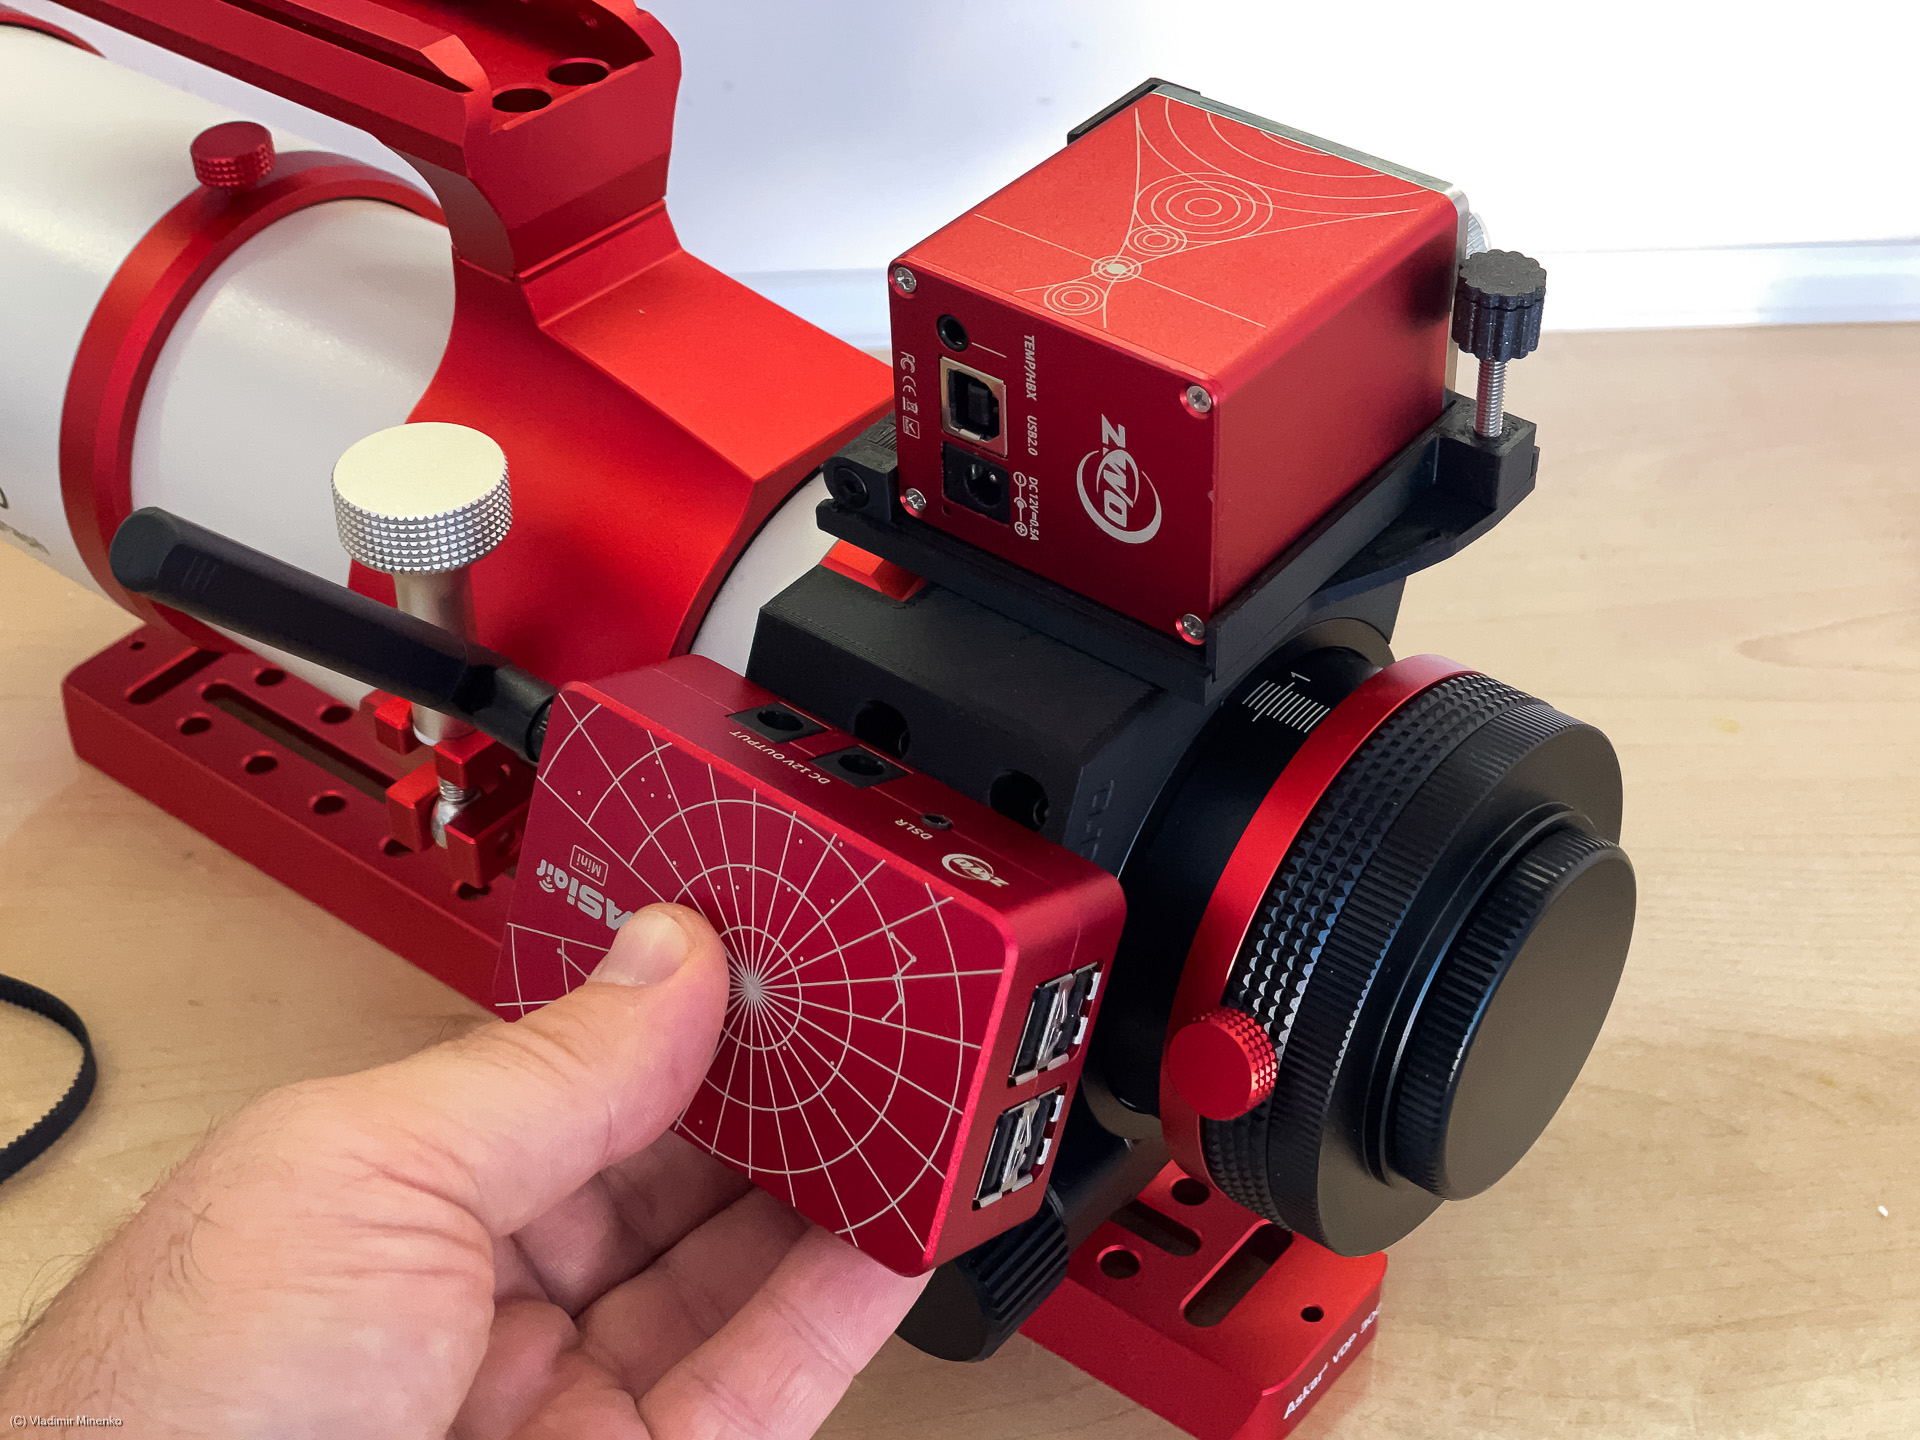
Alternatively, use can mount ASIAIR with connectors on the top. This might handy in cases if the camera has a short backfocus and focus distance.
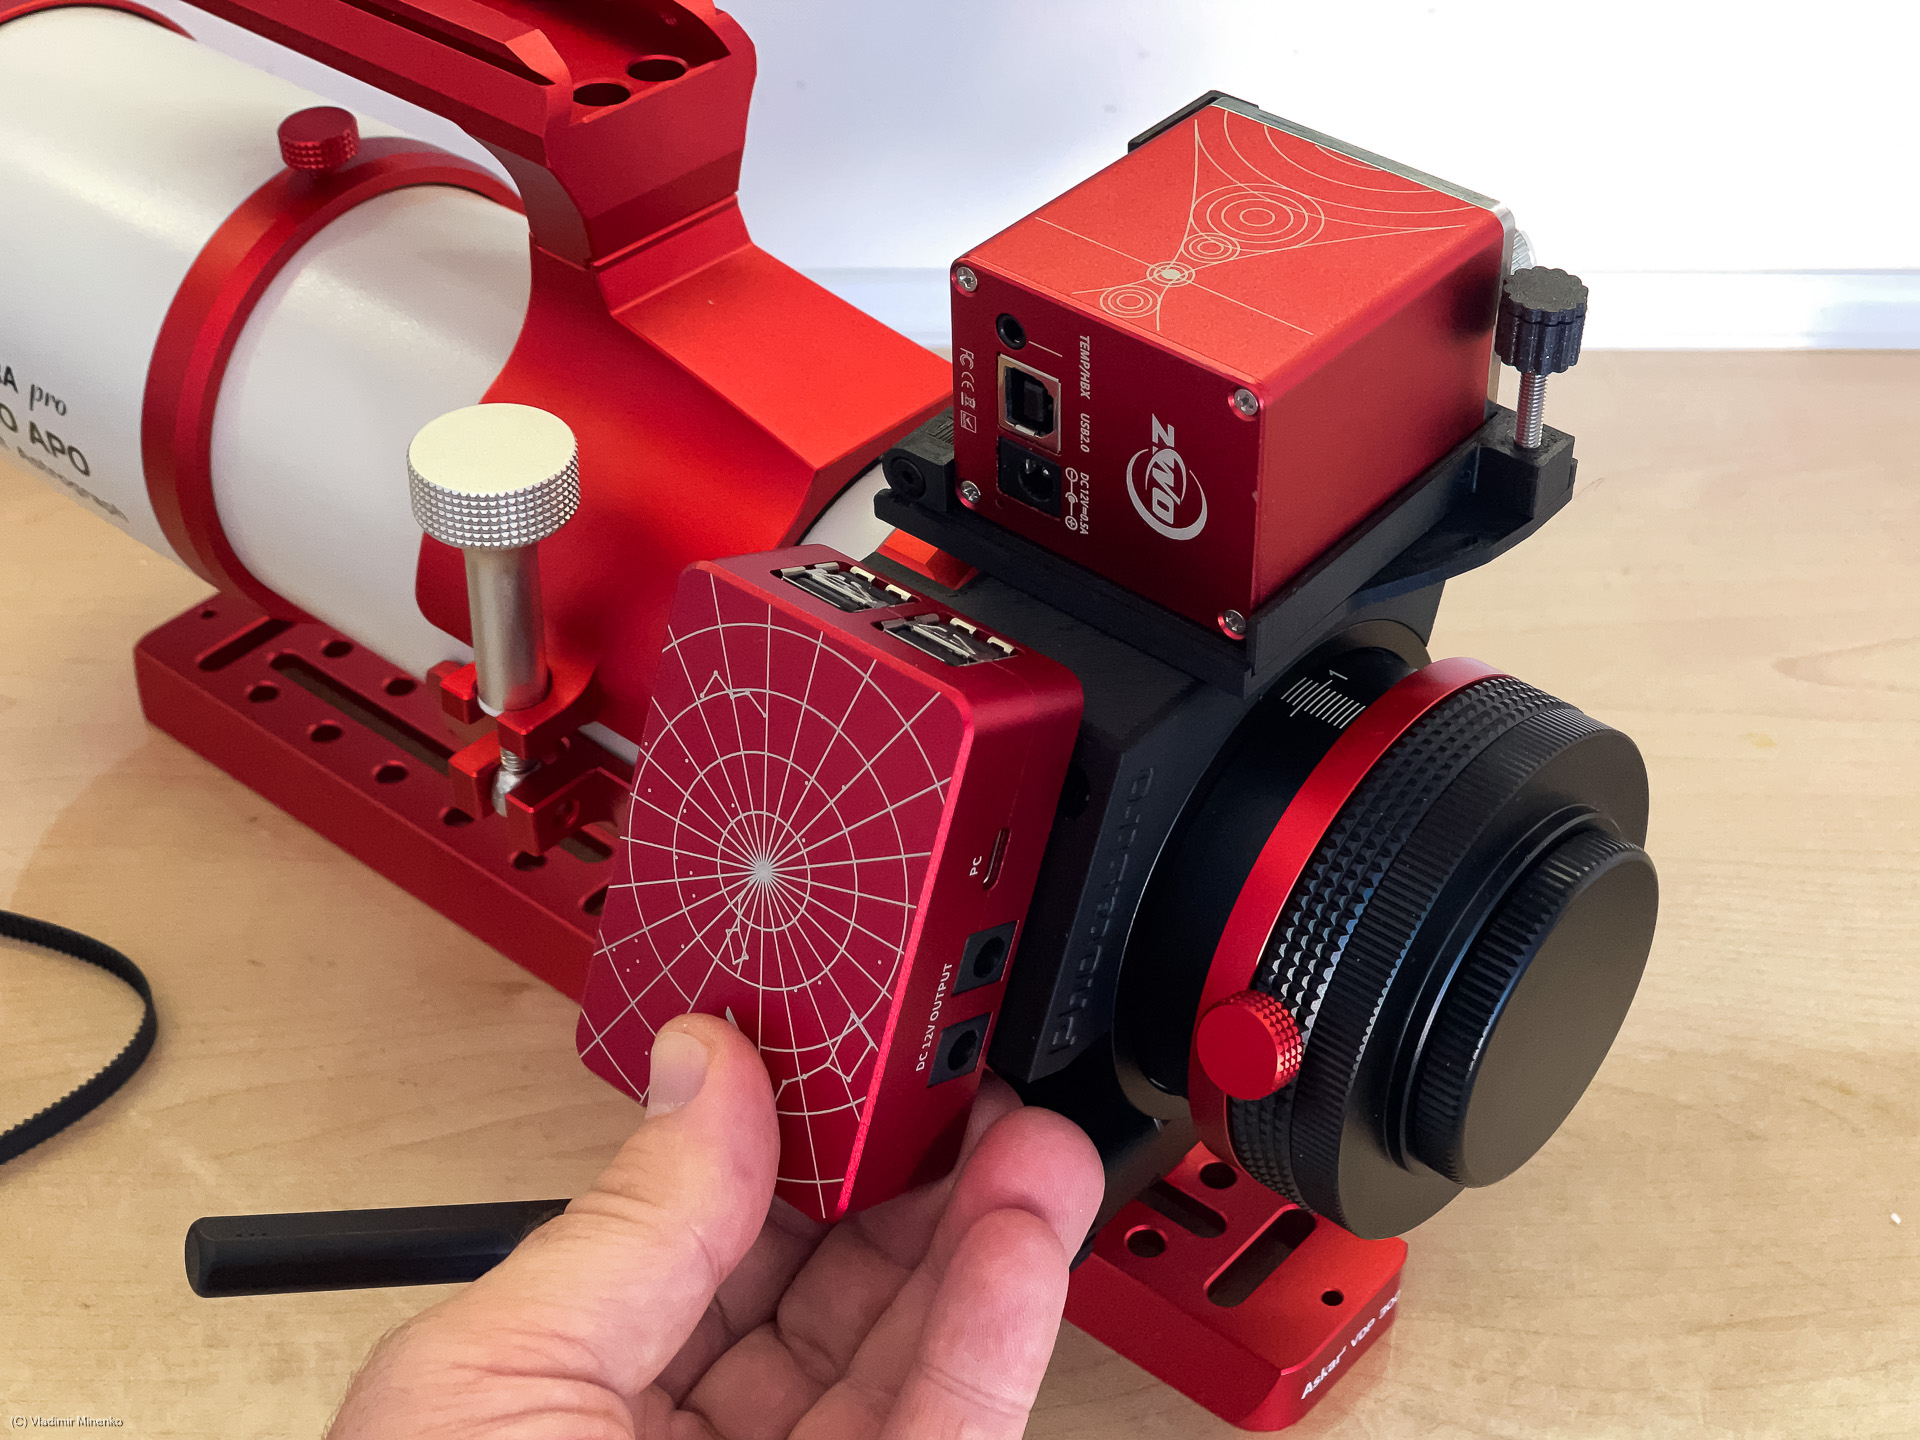
The ASIAIR Mini can be used and mounted in different orientations as well.
The ASIAIR Plus works the same way.

All models of ASIAIR are mounted vie the adapter which slides into the fame.

Place ASIAIR in the orientation in which you want to start and memorize how the adapter would be place on the casing.
Before mounting ASIAIR, you need to mount the adapter in the selected orientation.

The adapter is fixed with two small TBD M3 screws on the bottom side. You need to place the telescope in the right side to better access them.

Lets have a look the choices to place the guide scope. You can keep using the clamp provided in the handle.

The mounting kit additionally provides a more compact form where the clamp which we dismounted on the first step can be mounted instead of the handle. The kit provides adapter for this. You mount the adapter with the original screws which were used to mount the handle.

The dismounted clamp in mounted on the adapter with the original longer screws. Keep the shorter ones for other needs.

This is how the result looks with a guide scope.

Now, lets mount the belt drive. It drive the coarse, larger knob of the focuser. A good way to mount it is to first put the belt adapter into the belt, the put the belt on the pulley on the EAF and then slide the adapter onto the knob.

The tension of the belt is controlled with the tension screw on the EAF holder. It is always a good idea to remove tension for a longer storage.
Hey! We are done now!

A shorter USB cable with 90-degree connector is optionally available with the kit in the shop.

Comments
Got an opinion on this topic or found a mistake? Please add a comment.
0 Comments